Categories
Tech

My Hackintosh ‘Hack Pro’ rig setup

Hackintosh - Think really different

A quick post that summarises my current Hackintosh rig as of October 2014. The following details my second Hackintosh, it’s the first build where I purposely selected all components for maximum compatibly with OS X. The first rig I ran to test the waters of running a Hackintosh was an old ASUS T2-PH1 hacked together with way too many kexts to keep count. It served well for its purpose at the time, but after a couple years I decided upgrade to something better. Note: this rig was first built back in January 2011 so it’s running a first gen Intel i7 which is pretty old nowadays, I should of really wrote this post a few years back. However some people are still running the old X58 series today so it should still have some relevance.

Rig details

  • Gigabyte GA-X58A-UD3R Rev 2.0 (BIOS ver FA)
  • Intel i7-930 2.80 GHz (overclocked to 2.93 GHz)
  • Corsair 6GB (3 x 2 GB) 1600 MHz XMS3 DDR3
  • EVGA GeForce GTX 660 Superclocked 2048 MB GDDR5
  • Samsung 840 EVO 120 GB 2.5″ SSD (MZ-7TE120BW)
  • WD Red 3TB 3.5″ HDD (WD30EFRX)
  • Corsair A50 1366 performance CPU cooler
  • Antec TruePower 650W modular PSU
  • Sony Optiarc DVD RW AD-7260S
  • ATAPI iHAS124 B (w/ custom FW for burning Xbox backups)
  • Display 1: Samsung SyncMaster T240HD (1920 x 1200)
  • Display 2: Samsung SyncMaster 2232BW (1680 x 1050)
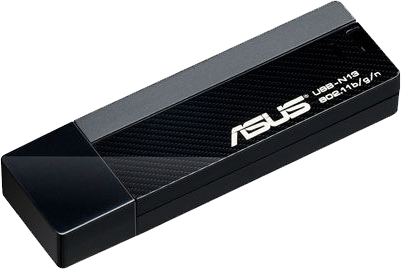
  • ASUS USB-N13 300 Mbps WIFI dongle
  • Belkin F8T016cw Bluetooth adapter (HID proxy)
  • Apple wireless keyboard and Apple mighty mouse
  • Logitech C310 HD webcam

Upgrades

I’ve ran the X58A-UD3R for over 3 years now with no issues, so at this point in time I have no need to replace the motherboard. Same goes for the CPU. The RAM I intend to max out to 24 GB (4 x 6 GB) at some point in the future as 6 GB is low even by todays standards for a workstation. The GTX 660 was dropped in about a year ago to replace an ageing 7950 GT 512 MB. Both of the hard drives are relativity new, the SSD is used for the system boot and the WD Red is used for document storage. The system is dual booted with a Windows 7 install which is stored on an additional hard drive.

It took me a while to find a reliable bluetooth adapter that was HID proxy compatible, meaning that I could use the wireless keyboard and mouse when interacting with the BIOS. Luckily I stumbled across the Belkin F8T016cw after a few failed attempts. Same goes for the wifi adapter, the ASUS USB-N13 is a solid piece of kit for the price you pay (not much).

From OS X 10.6 to 10.10

The system was first built to accommodate OS X 10.6 Snow Leopard, and 4 years later it is still fighting on strong with most recently having OS X 10.10 Yosemite installed. Considering the system was first built when I was at uni (thank you student loan), it has held up very well over the years. The main two benefits being; the reduced upfront cost of the components compared to a genuine Mac, and the added future proofing gained by using commercially available off the shelf components (non-Apple hardware).

Make your own

I’d recommend to anyone who wants to use OS X as their main OS to have a go at building a Hackintosh. It’s no where as difficult as it used to be getting a stable build working, there are countless forum threads and YouTube videos detailing successful build combinations like mine above. Not only is it a great learning experience to build your own computer, most importantly you also save ALOT of pennies!

To give you a kick start, Tonymacx86.com is a great resource for building your first Hackintosh, with new detailed and up to date build guides released monthly. Link here

Categories
Tech

Nintendo 3DS reset forgotten parental pin

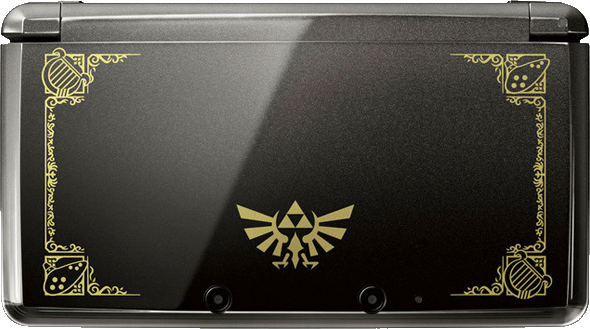
Nintendo 3DS
To celebrate the 25th anniversary of The Legend of Zelda and to mark the occasion, Nintendo released a special 25th Anniversary limited edition Nintendo 3DS system, marked with the Hyrule emblem and golden-coloured embellishments.

A recent purchase from eBay led me down the route of needing to reset a forgotten parental pin from a forgetful eBay seller. Without the pin, the 3DS was locked in a state where I couldn’t perform a factory reset or alter many system settings. In order to remove the parental lock, naturally you needed the corresponding parental pin.

The eBay seller was slow at replying to my emails and I was going evermore impatient, so luckily after a bit of googling I stumbled across a reset tool on GitHub that was 3DS compatible.
The repo contains a small C utility named parentool and a makefile.

The GitHub repo for parentool can be found here

Simply checkout the repo, fire up terminal, change directory to the downloaded repo and compile the utility using the ‘make’ command.

Once compiled, the tool can be run with

./parentool <enter service code here> <month> <day>

The service code can be found on the device when attempting to remove the parental lock.

-Happy gaming!

Categories
Tech

ASUS USB-N13 working with OS X 10.9 Mavericks

ASUS USB-N13

A recent move of my Hackintosh resulting in no easy access to jack in an ethernet cable so I had to find a suitable wireless adapter that plays nicely with Mavericks.

I settled on the cheap and cheerful yet surprisingly decent ASUS-N13. It supports wireless B/G/N (< =300Mbps) and includes a 3-year warranty. Note that there are two hardware revisions for the USB-N13 (A1 and B1), this post will only work with the B1 revision due to ASUS switching chipsets between revisions, from Ralink (A1) to Realtek (B1).

  1. The USB-N13 drivers found on ASUS’s site for OS X only support up to 10.7 and prove to be too outdated for 10.9. However, the USB-N13 (B1) uses the Realtek RTL8192CU chipset and so luckily you can grab a more recent driver package from Realtek here
  2. Scroll to the RTL8192CU section and download the version for OS X 10.8 (they will work with 10.9)
  3. Install the downloaded drivers and reboot
  4. Plug in the USB-N13 and open the newly installed ‘Wireless Network Utility’ in order to configure your wireless settings.
  5. Fingers crossed it should work! 🙂

    Update 02.02.15

    In order to stop the wireless application from launching upon boot, just delete the corresponding LaunchAgent file.

    sudo rm /Library/LaunchAgents/Wlan.Software
Categories
Tech

FreeNAS disk error nightmare..

When I first started tinkering with FreeNAS I installed it on a spare MicroServer just to try it out. The system only had 4GB of RAM installed, so I opted to create a UFS volume over a ZFS volume, as the latter requires at least 8GB of RAM according to the system requirements.

After some success with getting the UFS volume to play nicely with Time Machine on OS X, I took the plunge and ordered a set of Kingston 16GB (2x8GB) DDR3 1333Mhz with ECC support for £119.56 at the time of writing, the link for Amazon UK can be found here.

After the RAM arrived, I installed into the system and destroyed the old UFS volume. Suddenly I was hit with an issue, any subsequent attempts of attempting to create a fresh ZFS volume would result in failure. Several disk wipes, reboots and volume creation attempts later I was left scratching my head. My gut feeling was telling me that FreeNAS was struggling to wipe the disks (Also checking the logs helped). After googling I was able to wipe the disks after entering sysctl kern.geom.debugflags=0x10.. Little did I know this would be the command that would cause my future problems. After the command executed I was able to wipe the disks and create my new ZFS volume.

This ran for about 4 weeks perfectly, until I upgraded the system from 9.2.1.5 to 9.2.1.6. After the upgrade the system rebooted and I was suddenly presented with a amber alert status. Also my ZFS volume had disappeared, and dsmeg was spitting out errors about my mirror being corrupt (see below).

freenas kernel: GEOM: ada1: the secondary GPT table is corrupt or invalid.
freenas kernel: GEOM: ada1: using the primary only — recovery suggested.
freenas kernel: GEOM: ada2: the secondary GPT table is corrupt or invalid.
freenas kernel: GEOM: ada2: using the primary only — recovery suggested.
freenas kernel: GEOM_MIRROR: Device mirror/system launched (2/2).
freenas kernel: GEOM: mirror/system: corrupt or invalid GPT detected.
freenas kernel: GEOM: mirror/system: GPT rejected — may not be recoverable.

After a few hours goggling I determined it wasn’t anything with the disks that had failed, whilst numerous forum posts pointed to that. Instead it was linked to how I overcame the issue of wiping the disks whilst attempting to delete my old UFS volume. Turns out I hadn’t rebooted the FreeNAS system upon creating the ZFS volume, hence the firmware upgrade had nothing to do with my problems. Instead it was a disk mounting issue that was persistent since the very beginning, I just wasn’t aware of it until that moment.

I deleted the ZFS volume using the FreeNAS GUI and attempted to create a new one in its place, which repeatedly kept failing with no success. In desperation I also attempted to create UFS volumes, but that also resulted in similar errors and failure.

This post significantly helped me with figuring out what was going on. After running gmirror forget, clear and remove I was able to fix my disk creation issue.

To ensure I didn’t run into the original issue I followed information from this post to ensure my disks were wiped correctly.

Finally I was successfully able to create a fresh ZFS volume and start afresh. This time making sure the volume was able to be successfully mounted after a reboot.

Categories
Tech

Cheap server for home lab – HP ProLiant N54L MicroServer (with cash-back offer)

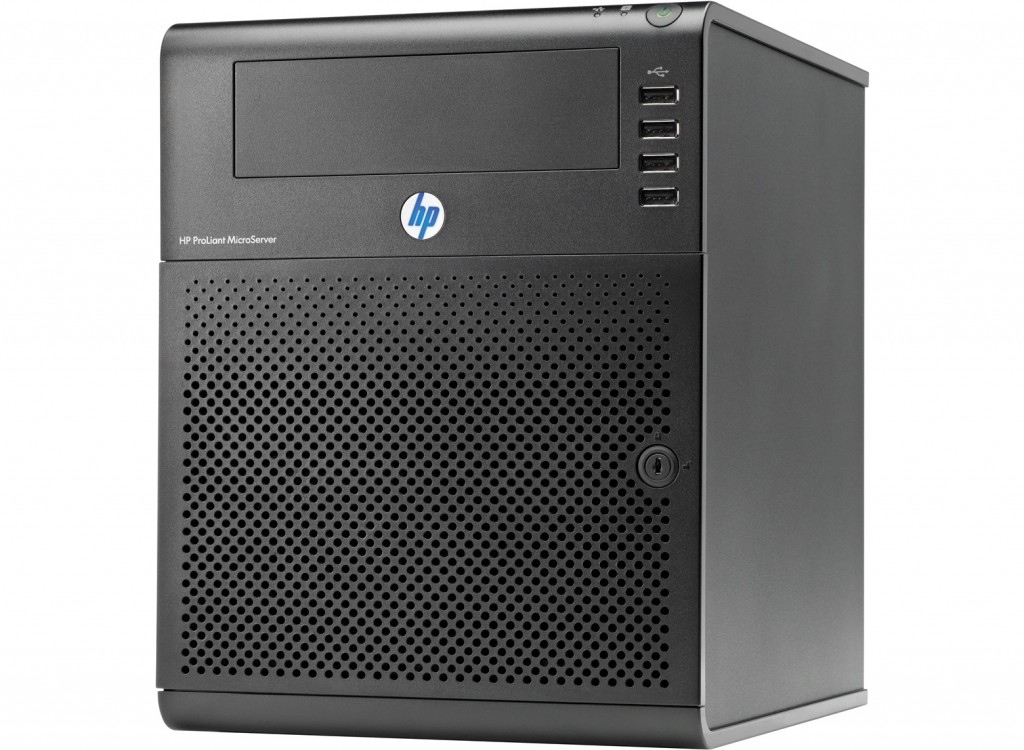
HP MicroServer G7

This post would of been more relevant a few months ago but earlier this year I was sent a link for HotUKDeals, there was an offer going to buy a HP ProLiant G7 N54L MicroServer for £97.94 (£263.94 with £166 cash back). The deal is now expired but can be found here anyway.

This is a nifty little server for the price; 2.2GHz AMD Turionâ„¢ II Neo N54L dual-core CPU, 2GB DDR3 ECC RAM, 250GB HD and 150w PSU. The great thing is the CPU includes support for virtualisation through AMD-V, allowing you to run fully-virtualised guests within bare-metal hypervisors like Xen.

The N54L states 8GB is the maximum amount of RAM supported, however after a bit of researching I came across a few articles claiming that 16GB is possible. I can confirm that my MicroServer is running 16GB. Amazon sell Kingston 16GB (2x8GB) DDR3 1333Mhz with ECC support for £119.56 at the time of writing, the link for Amazon UK can be found here