Categories
Tech

Mac Pro 1,1 Restart on Wake issue FIXED

Until recently my 1st Gen Mac Pro suffered from the somewhat known ‘restart on wake’ issue, but no longer as a replacement PSU appears to have cured it.

I picked up the Mac Pro a couple years ago for £50 and I haven’t done much with other than install an SSD, upgrade to 32GB RAM and use it as a gitlab runner. It’s still running the original dual dual-core Xeon CPU’s and Yosemite which is really starting to show it’s age due to apps claiming the OS is too old for them to run after updating.. This combined with you effectively had to disable sleep to have a working machine led me to stop using it for a while.

I’d tried a few things over the months to isolate the restart on wake issue.

  • Installed a fresh copy of OS X Lion (The max officially supported version of OS X for the Mac Pro 1,1) – Issue still present
  • Swapped out the 32GB RAM from eBay with the original Apple 4GB RAM whilst still running Lion – Issue still present
  • Aquired a copy of Apple Service Diagnostics (3S108) to test hardware and run memory tests – No problems found, issue still present
  • Installed a copy of Ubuntu 14.04 for Mac and upgraded to 16.04 to isolate if the issue was specific to OS X – Issue still present

After trying all these things I’d ruled out that the issue wasn’t RAM or OS related, which seemed to be the cause of most problems for others running into a similar sounding issue. I figured it was either going to be something to do with the logic board or PSU and being as the PSU’s were going for £50 on eBay I thought I’d try my luck (also the fact it made some strange clicking noises when going into/out of sleep gave me a big hint).

After swapping out the PSU following this iFixit guide the issue immediately disappeared. Sleep now works perfectly again in both OS X and Ubuntu, however I’m sticking with Ubuntu 16.04 for the moment simply as that software is still supported.
Categories
Tech

Clover r4586 update results in black screen

After updating my Z97X-UD3H running 10.12.6 to Clover r4586 the system would hang on a black screen shortly after the Clover boot menu.

Luckily I stumbled across this post that says the OsxAptioFix3Drv-64.efi driver has been removed, and that AptioMemoryFix.efi should be installed as its replacement from now on.

I can’t remember if Clover deleted OsxAptioFix3Drv-64.efi for me or not, but after installing AptioMemoryFix.efi the system started working again. Success!

A quick but useful explanation of the various drivers64UEFI memory fixes can be found here

Categories
Tech

3D Printed Throttle Body Mockup

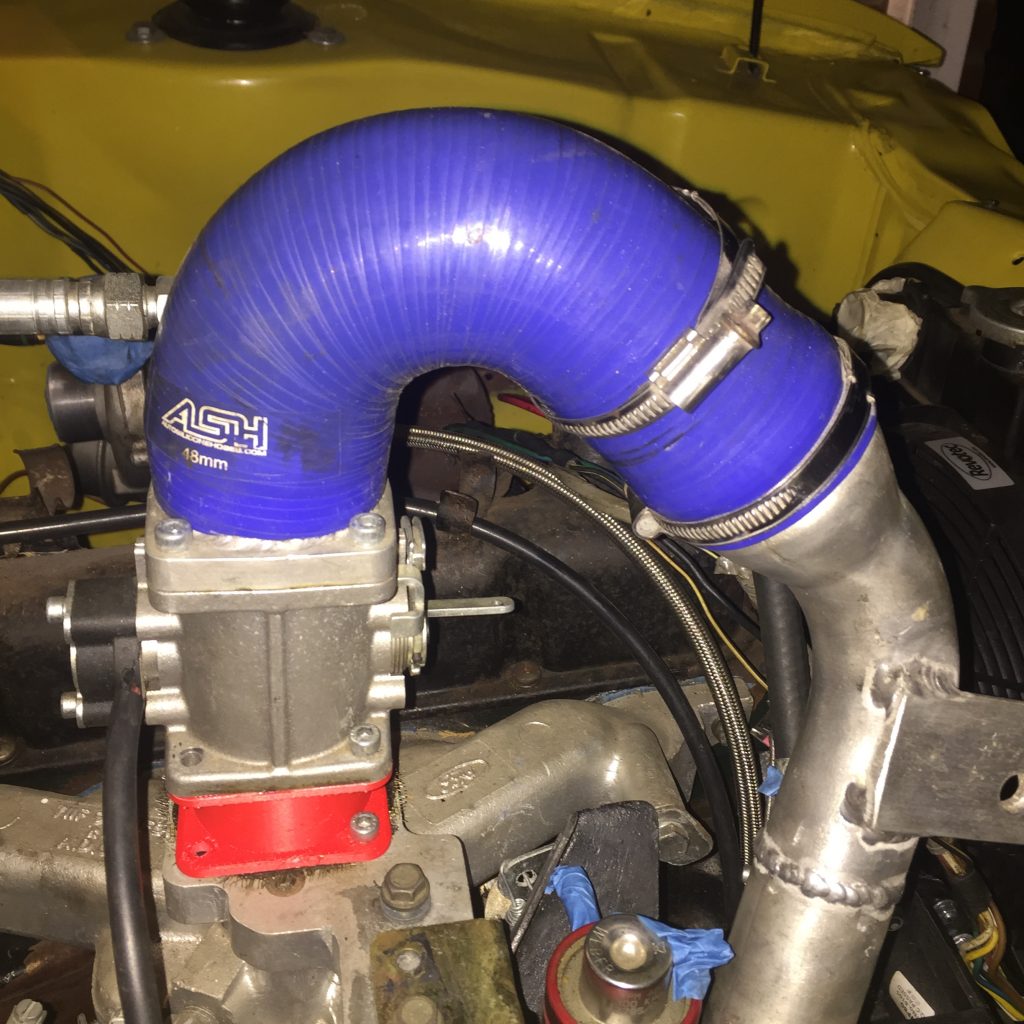
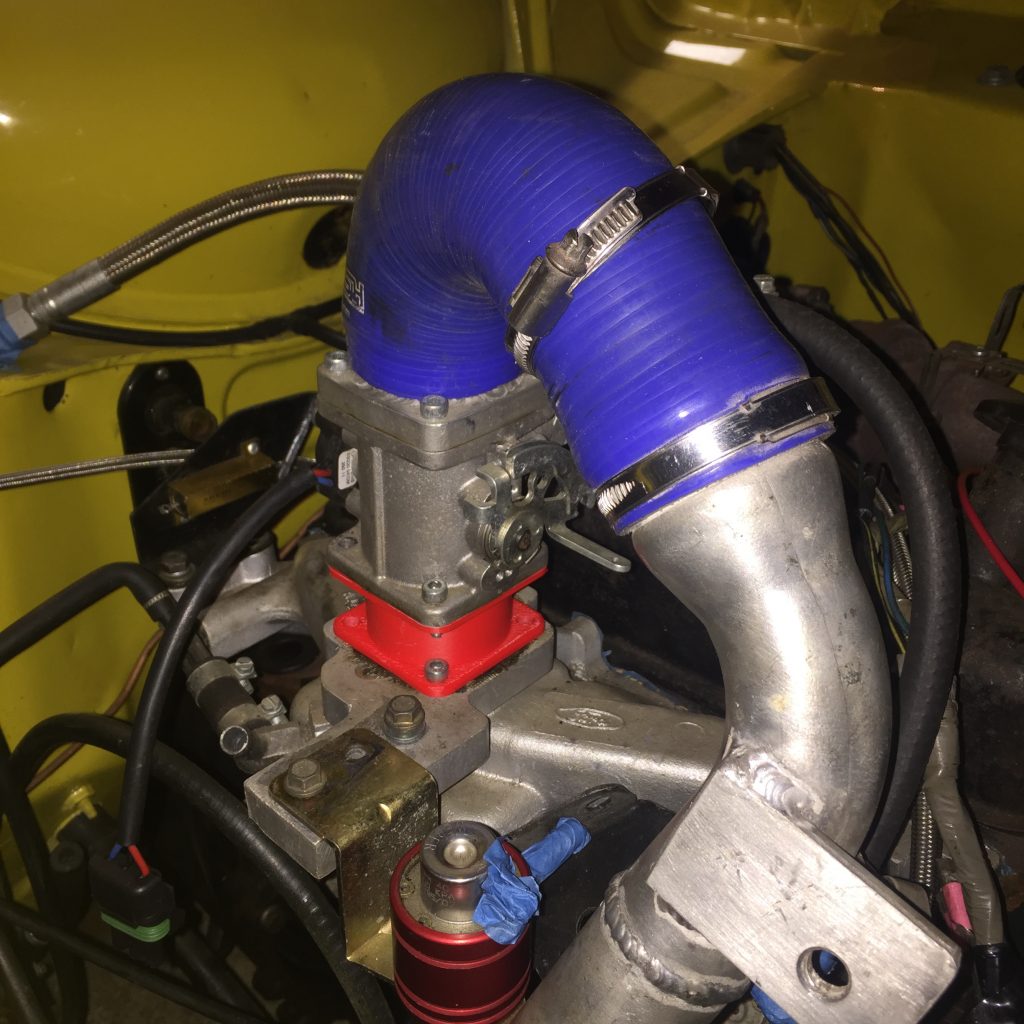
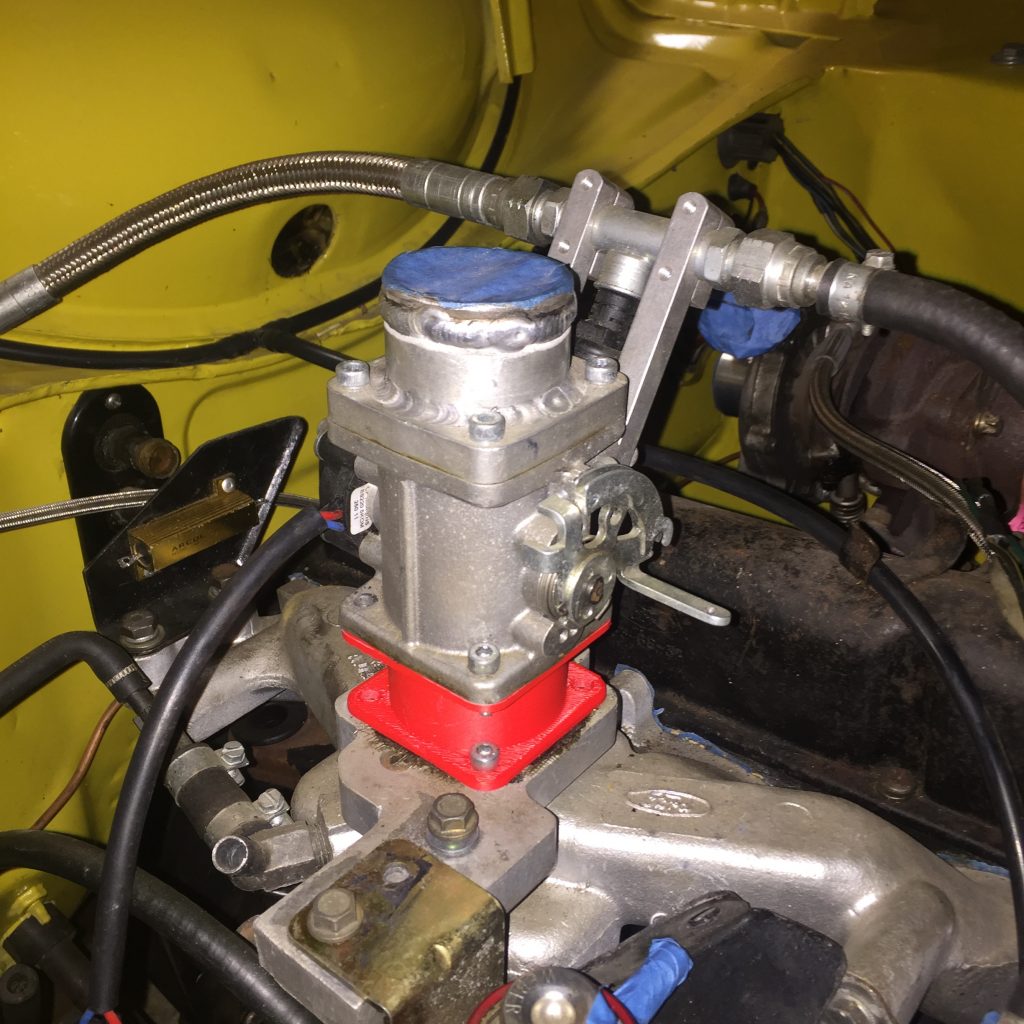
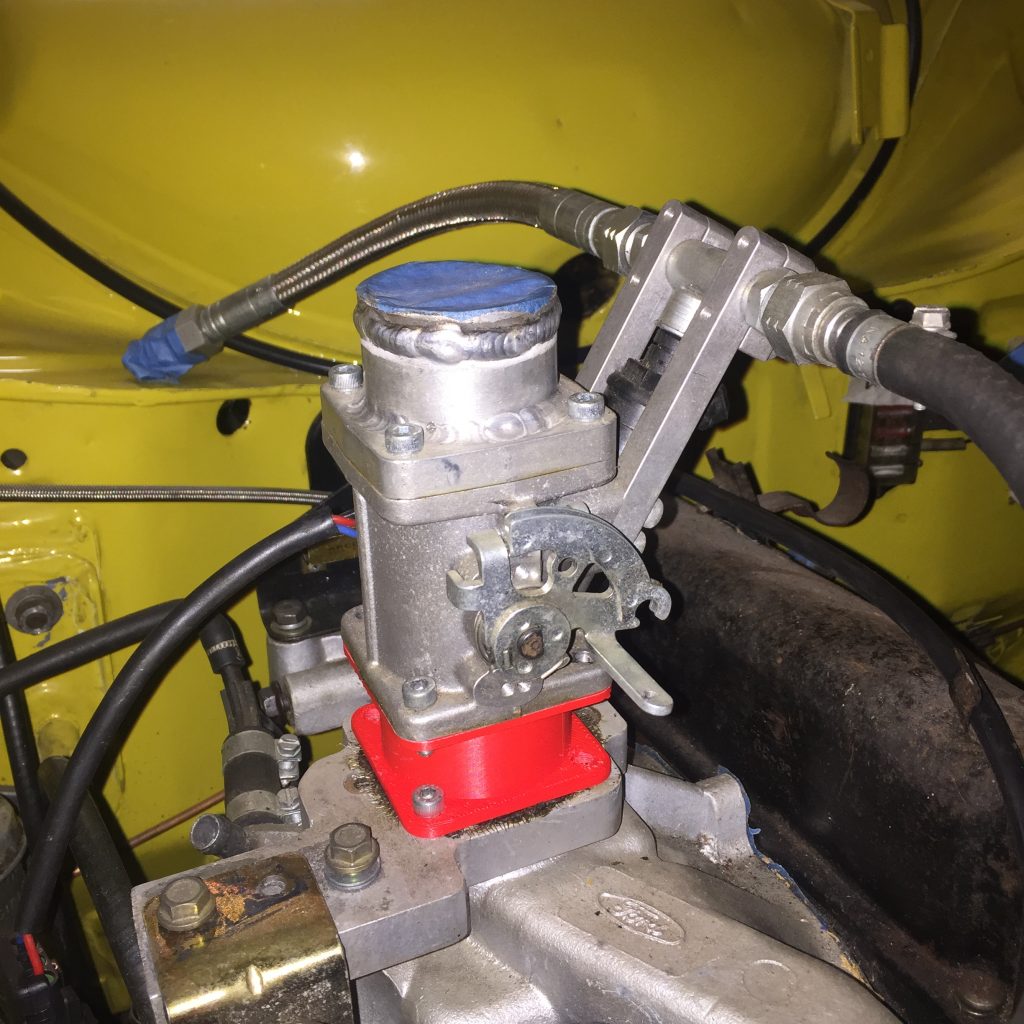
I quickly modelled and 3D printed a 30mm Jenvey TB mockup to see if it could be used to improve the current injection system which may/may not have had fuelling distribution issues.

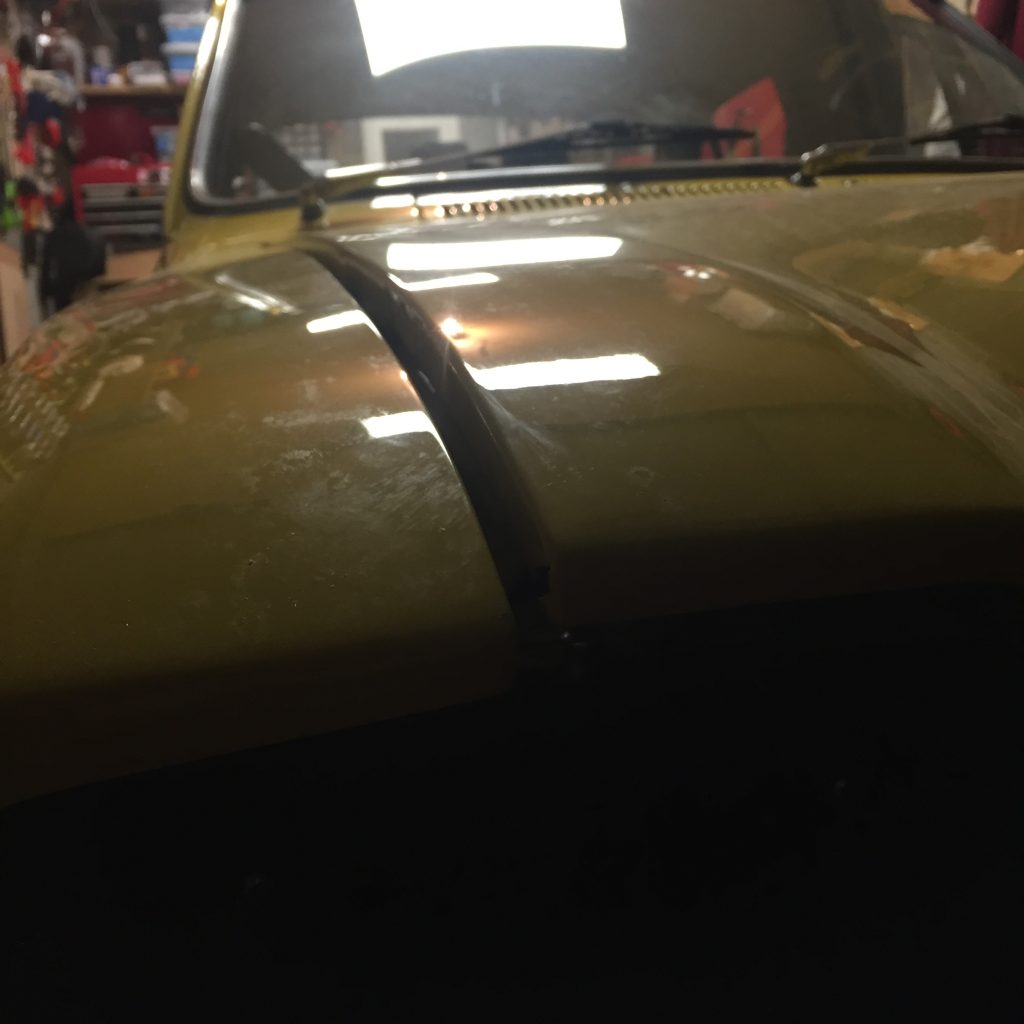
Added on the Intake pipe from the Intercooler on to see if it would clear bonnet clearance..


It didn’t..

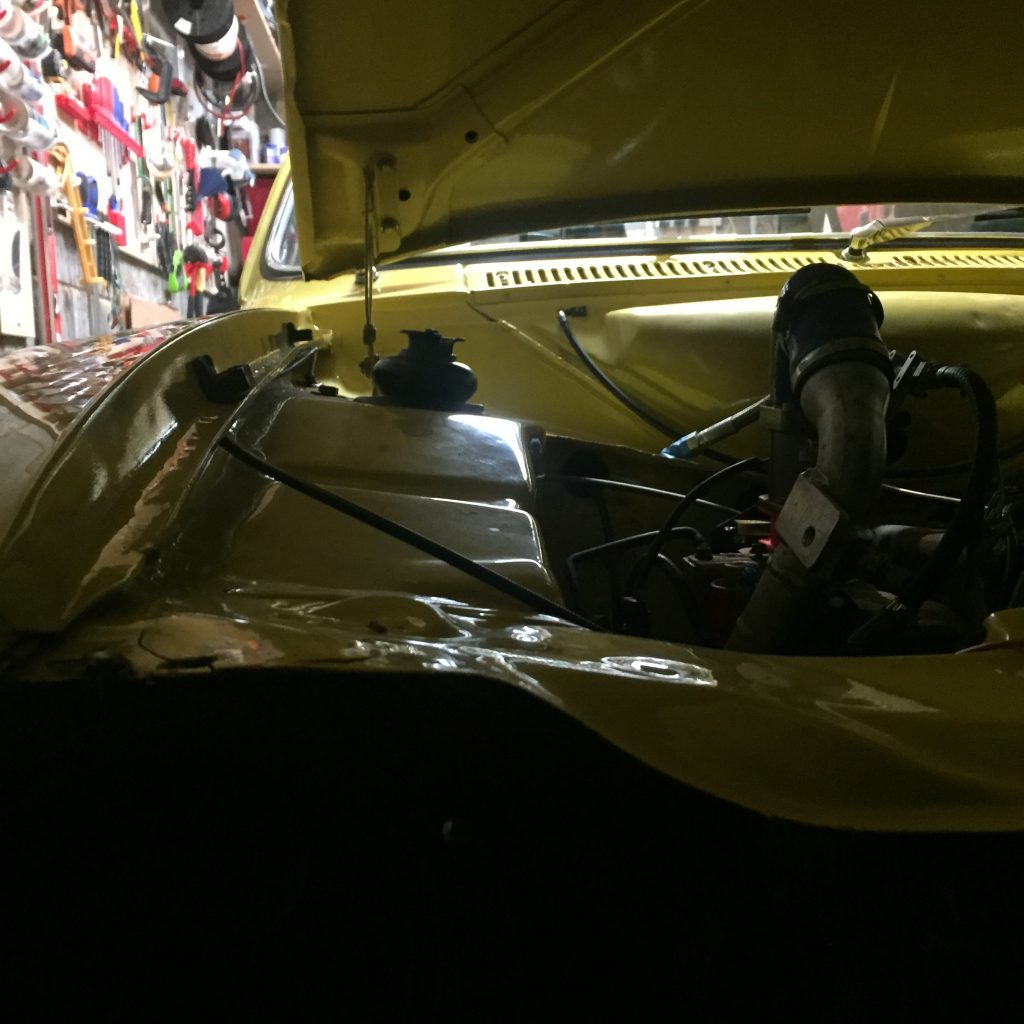
As it turns out there must be less than 30mm clearance between the top hose and bonnet as with the extra part fitted the bonnet won’t close.

Guess I could try cutting down the top silicon pipe where it meets the top Jenvey TB, but it would be a tight fit, has potential though.

Categories
Tech

macOS 10.12 Sierra GA-X58A-UD3R Hackintosh install (Clover)

macos-sierra-logo

With the recent release of macOS Sierra 10.12 (previously OS X) my current OS 10.10 Yosemite install has been pushed to n-2 support status (Apple supports 2 versions prior the current release), meaning Apple will drop support for security updates upon the next release of macOS, presumedly due 2017. This means the time has come to update my 10.10 Yosemite install to 10.12 Sierra.

I decided to just skip the 10.11 El Capitan release and perform a fresh install. Over the weekend I managed to get a fresh Sierra install working on a spare HDD, allowing me to test its stability whilst still running my daily workhorse Yosemite install.

Nearly everything works as it should; bluetooth, GPU HW acceleration, sound, ethernet. Once again the only thing not working properly is sleep/wake/hibernate. But I remain persistent to get those working with this release and install.

Below is a summarised step of instructions I performed to get a persistent working install, please note you will need access to an existing installation of OS X to perform the Hackintosh installation.

  1. Download the latest version of Sierra through the Mac App Store on the existing Mac.
  2. On a Windows installation, insert an 8GB (minimum) USB drive and quick format it to FAT32.
  3. Insert USB stick into the existing Mac and use Disk Utility to name the drive ‘USB’ as well as formatting the volume type: Mac OS Extended (Journaled).
  4. Using terminal, create a bootable USB installer by entering the following command
    sudo /Applications/Install\ macOS\ Sierra.app/Contents/Resources/createinstallmedia --volume /Volumes/USB --applicationpath /Applications/Install\ macOS\ Sierra.app --nointeraction
  5. Download the latest version of the Clover bootloader (r3793 at the time of writing)
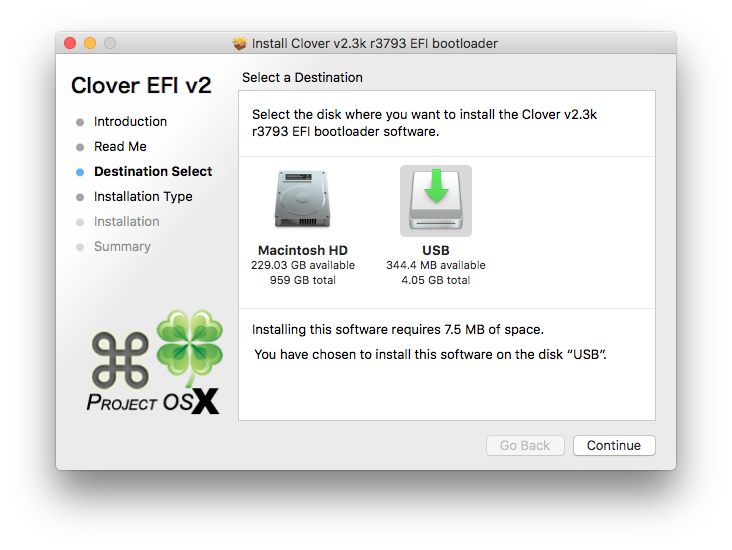
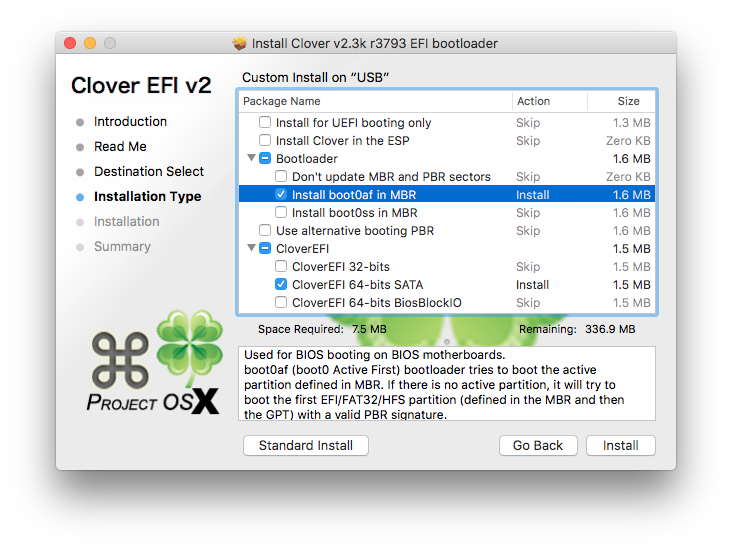
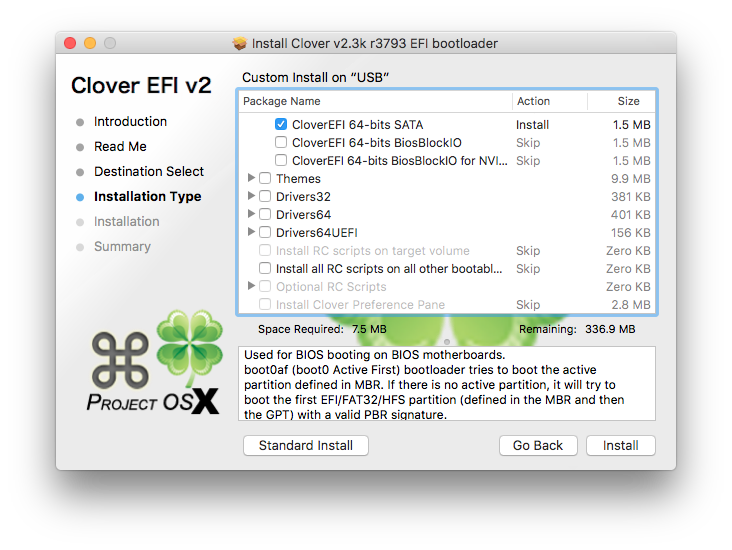
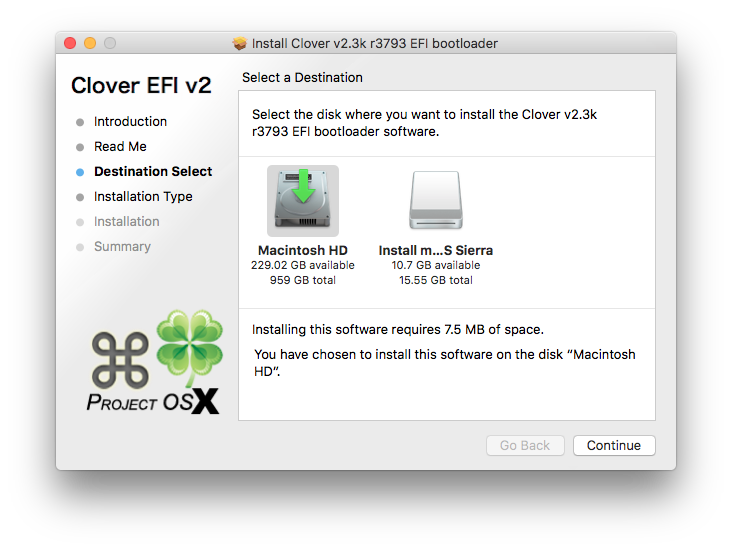
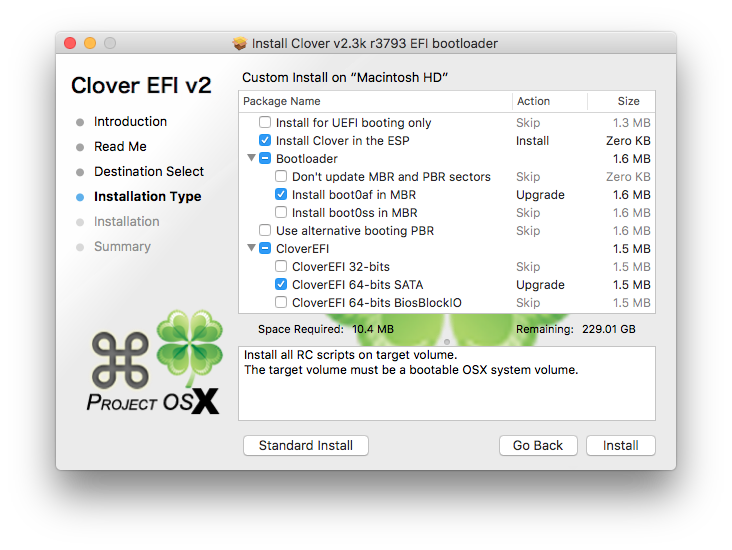
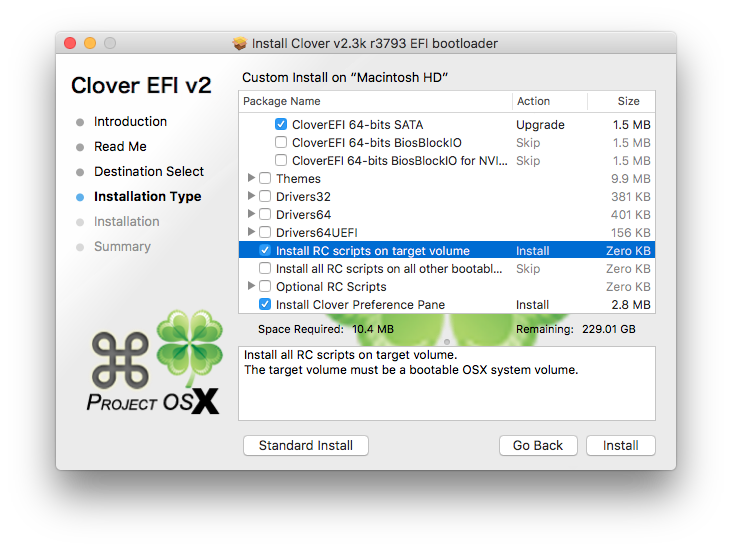
  6. Run the Clover installer and ensure that the USB is selected as the installation location, customise the config to mirror the settings below
    Select USB as the installation location
    Clover configuration options for GA-X58A-UD3R page 1
    Clover configuration options for GA-X58A-UD3R page 2
  7. Replace on the drive /EFI/CLOVER/config.plist with the config provided here
  8. Download and extract FakeSMC, NullCPUPowerManagement and RealtekRTL8111 to EFI/CLOVER/kexts/other
  9. Insert the USB in the X58A-UD3R Hackintosh, hit F12 on boot and boot from the USB installer
  10. When prompted by the Clover bootloader, boot from the macOS installer USB
  11. Install macOS Sierra as normal to your target drive. When the installer reboots the machine, ensure that you boot from the USB key again using F12, but then select to boot from the target drive in the Clover menu to finish off the installation
  12. When the install is finished, download Clover again and install it to the target drive using the following settings
    Ensure that the target drive is selected for the installation location
    clover-legacy-config-options-page1
    clover-legacy-config-options-page2
  13. Mount the EFI partition on the target drive using Clover Configurator
  14. Replace on the EFI partition /EFI/CLOVER/config.plist with the config from the USB
  15. On the EFI partition; create a folder at /EFI/CLOVER/kexts/10.12 and copy FakeSMC, NullCPUPowerManagement and RealtekRTL8111 from the USB into it.
  16. Download the relevant DSDT file for your X58A-UD3R (dependant on installed BIOS) from the DSDT database here and rename/copy to the EFI partition at /EFI/CLOVER/ACPI/patched/DSDT.aml
  17. Reboot the Hackintosh, remove the USB and you should be able to boot the target drive using the Clover bootloader (now installed on the target drive itself)
  18. I was able to get audio working by using clover configurator to disable SIP and then using Toleda’s scripts for Sierra to fix the audio

This install is still a work in progress for me and will be updated as time goes on and I hopefully get more things working.

Categories
Tech

Plex – An update is available error

Plex Logo

A few years on from installing Plex in my home lab and I must say I’m hooked. The ability to stream personal media to a variety of different devices (Mac, iOS, PS4, Fire TV Stick..) wherever I happen to be in the world is simply.. just awesome! It’s like having your own private Netflix streaming service.

However one problem that had annoyed me since my first install was a bug that displayed a notification informing a Plex server update was available. Regardless if the server was fully up-to date or not the notification remained in place. I remember trying to find a solution when the error was first realised however since it wasn’t impacting any functionality I must of given up my search fairly quickly.

Fast forward a few years and I finally have found a solution, as simple as it happens to be. So if you to have the issue of a constant notification under ‘Server’ -> ‘General’ saying “An update is available. Please install manually”, all you have to do to get rid of the message is ensure you are running the latest version of Plex and then simply sign out and then back in again on the server itself. To ensure I was actually signing out/in on the server I entered the private IP address of my Plex server and performed the actions from there.

As stupid of a solution it is I hope it helps. After years of a nagging error message, alas no more!