Categories
Tech

Using Buildroot for IoT Projects

Buildroot RPi Yocto Logos

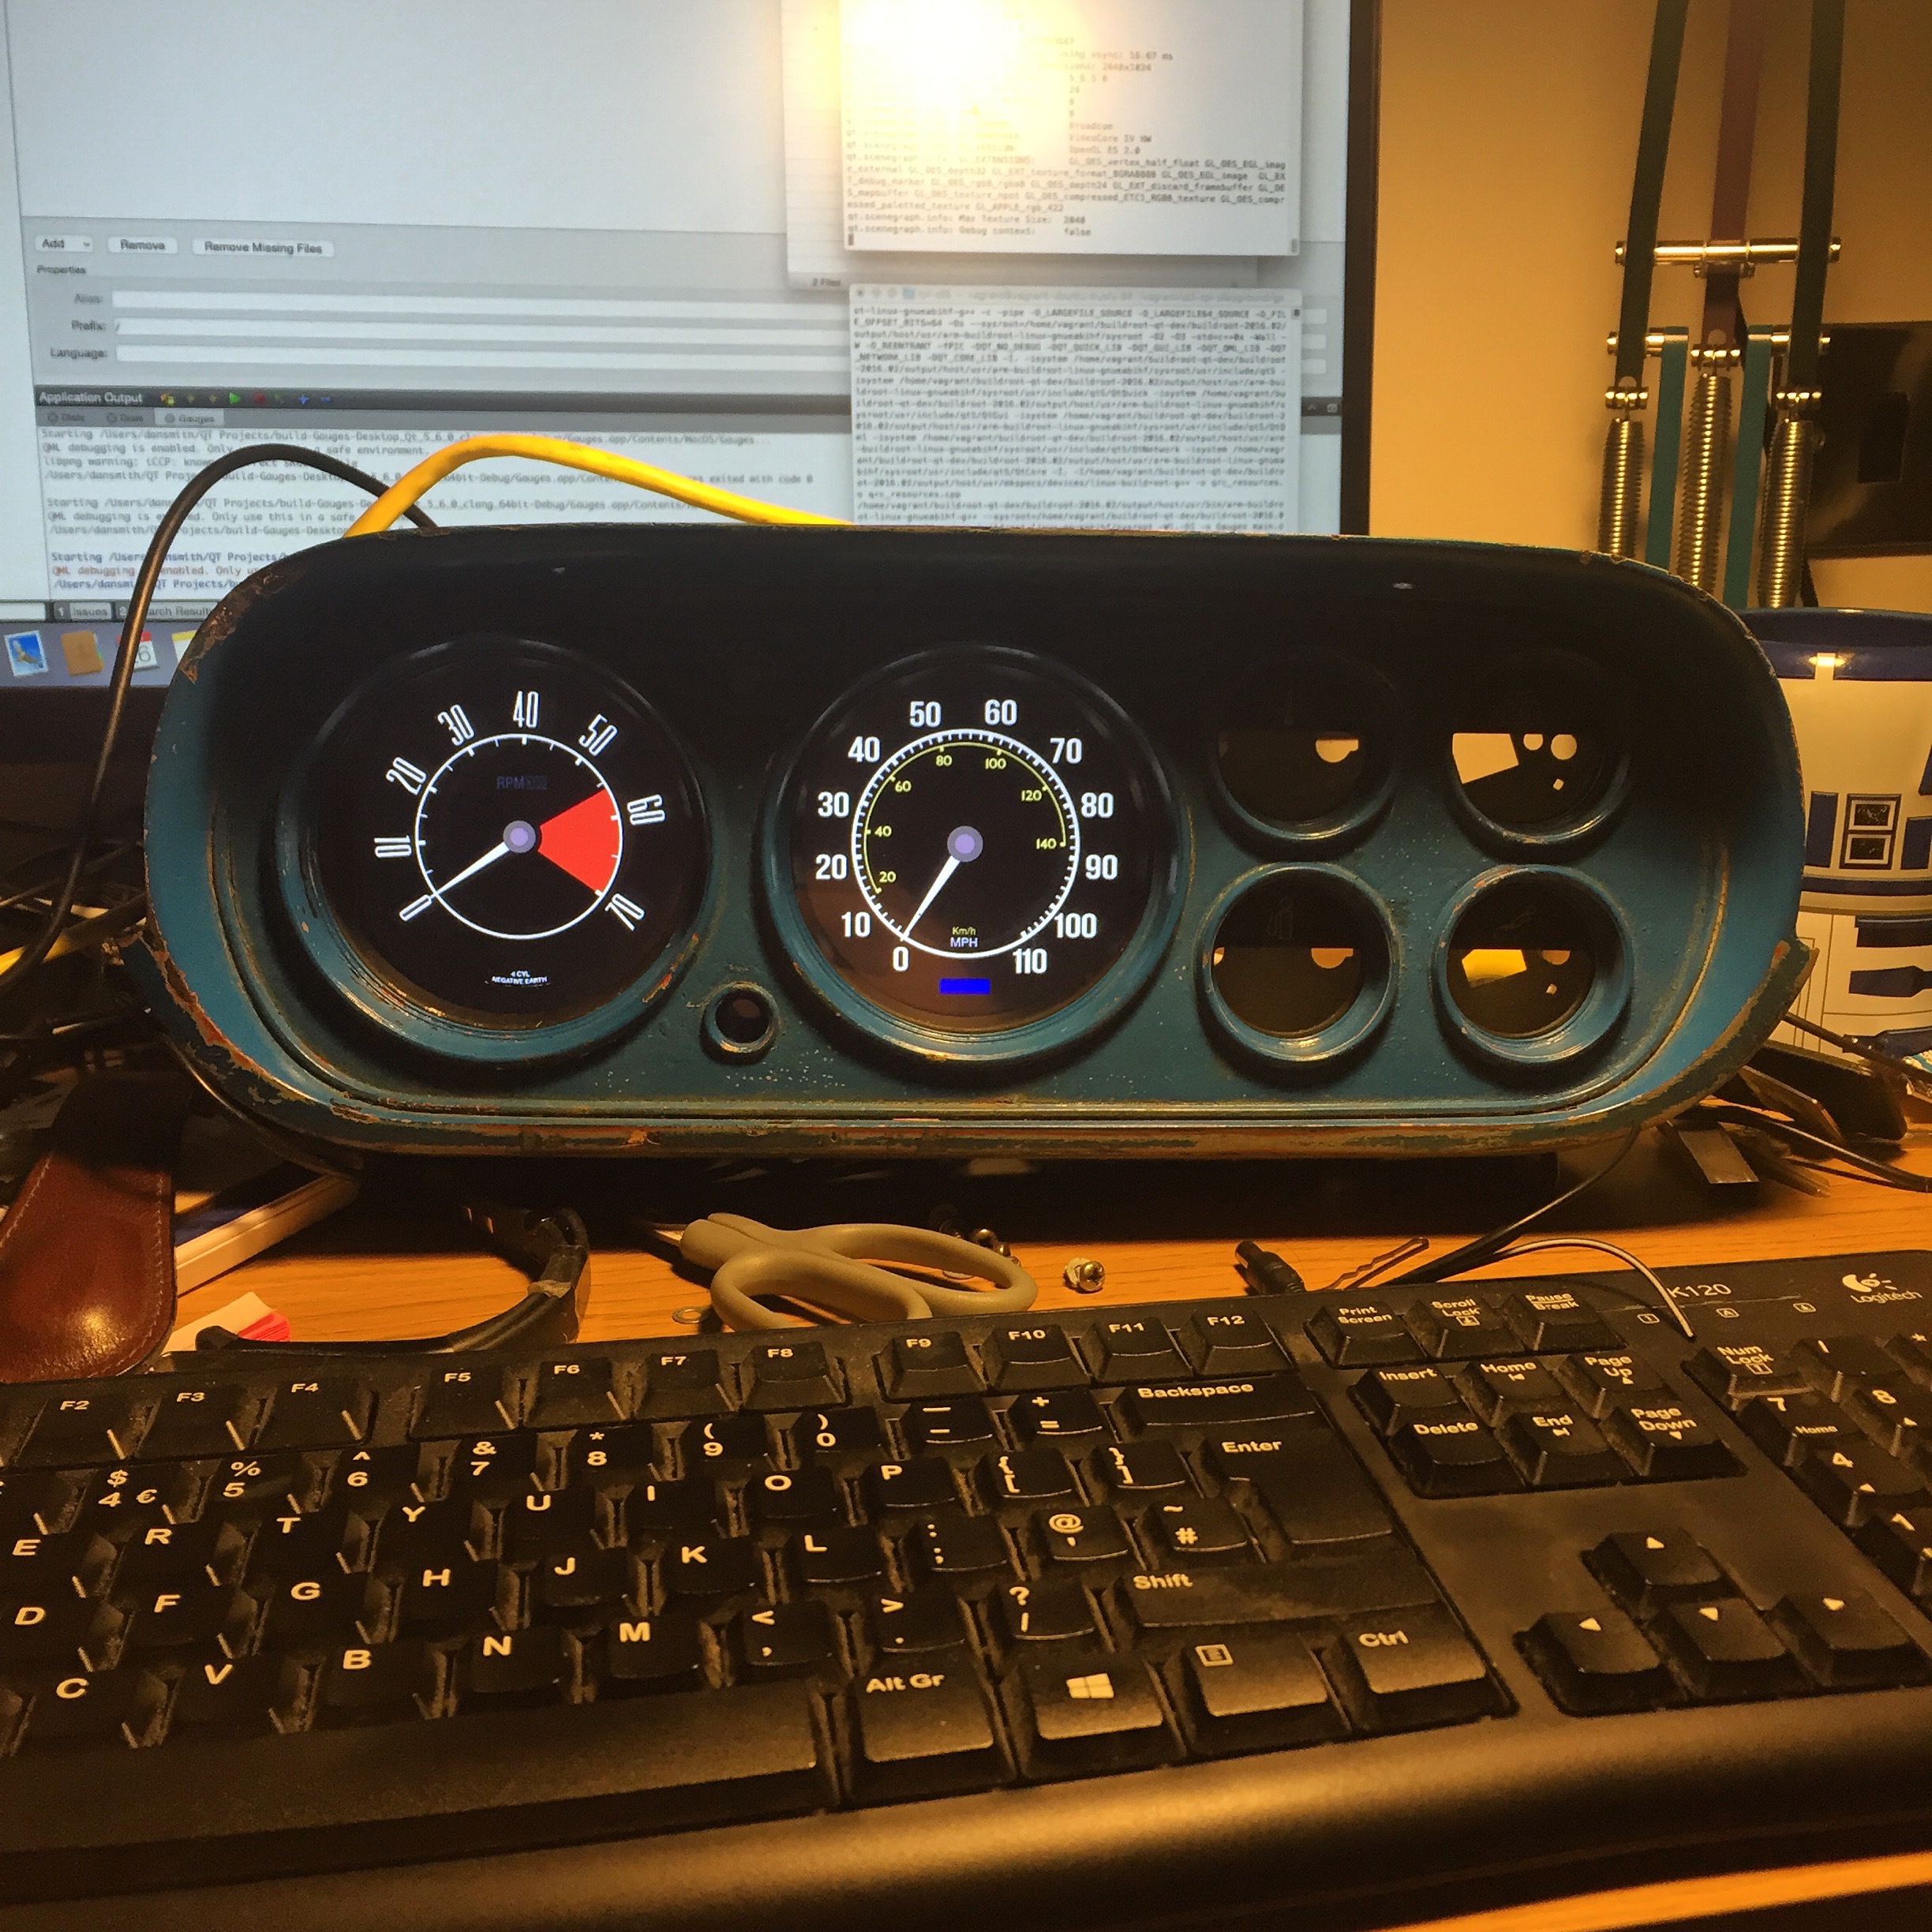
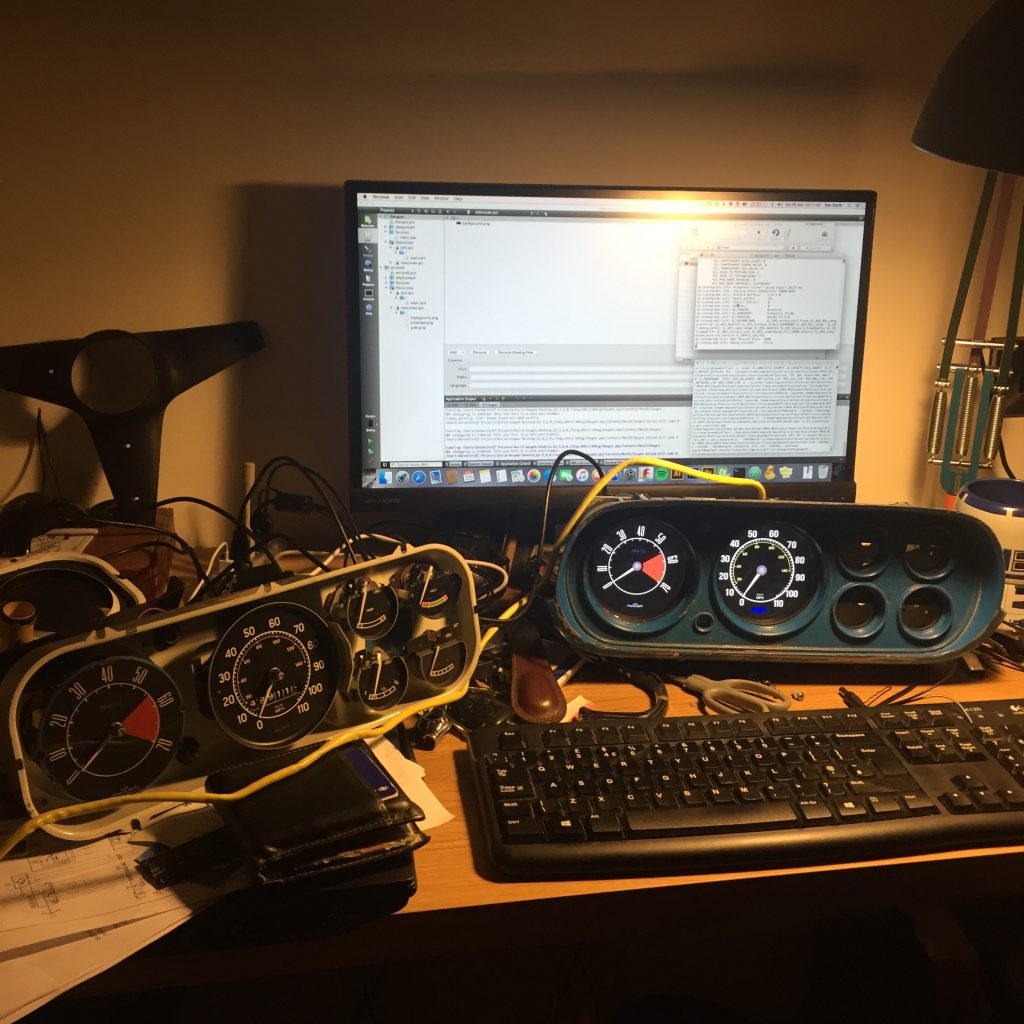
Early on in my effort to build a digital dash for my car I quickly realised I needed to run a stripped down version of Linux if I was to have any chance of getting the dash to boot up quickly on the Raspberry Pi. A dash that kept you waiting for tens of seconds or at worst minutes to turn on wouldn’t exactly be the most practical of solutions (especially if you want to avoid speeding fines hehe).

So I was faced with the situation of taking one of the existing distributions available for the RPi and modding it for my own use, or having a crack at making something myself that would do the job. Initially I did start tinkering around with seeing how fast I could get stripped down versions of Raspbian and Arch booting up, which although was interesting did feel as though I was spending a lot of time and effort digging down in the dirt and undoing a lot of work someone else had already spent a lot of time doing. Therefor instead of trying to tear something down to suit my needs, I decided to focus my attention to incrementally building something useful from the ground up. I figured doing it this was would be a great source of learning as I would no doubt begin to run into obstacles other people have already created solutions for, meaning I would appreciate the open source communities hard work even more so.

After a bit of searching I found a couple of promising looking projects to base my dash on (I really didn’t feel like totally reinventing the wheel). Both Buildroot and the Yocto Project share the common goal of creating a complete, easy to customise, embedded Linux system. Both compile Linux from source using cross-compilation (which should cover most performance requirements), are well documented, actively maintained and already used within the embedded systems industry. In fact I had already been exposed to the Yocto project before without even realising when I attended an Intel Edison workshop at the London FabLab, as the Linux image supplied by Intel for use on the Edison is a Yocto build.

Whilst I already had some experience with Yocto I decided to kickstart my digital dash using using Buildroot. Namely in the effort of simplicity as to get started with Buildroot is just so easy. The documentation available is awesome and provides a steady learning curve. I also found a pretty good short book on using Buildroot with the RPi which was neat primer. After a bit of tinkering I had the environment setup in a Ubuntu VM as well as a working filesystem that booted in seconds on my RPi2. I quickly appreciated the number of tools available out of the box in major Linux distributions as theres really not much to do in a basic buildroot build other than logging in and a few system utils to work with.

It was not before long I had my buildroot environment stored under Git and had automated a few of the basic build commands, such as copying over custom apps after a successful build and flashing the filesystem to SD card. All in all it didn’t take a ton of effort to get a simple enough system working that booted up fast, was capable of connecting to the Internet and launched my prototype app on boot. My prototype app is built using QT with PyQT bindings, both of which buildroot supports although not the latest versions.
I would happily recommend Buildroot to anyone who wants to learn more about Linux targeted for embedded devices and IoT projects, it really is a pleasure to work with and the community behind it is very resourceful and helpful.

Looking towards the future for my digital dash there may come a time where I may have to look to migrating towards other projects like Yocto. Buildroot is great and pretty much does everything I need at this point in time, however it does have what I consider to be quite a big no-go – especially in the IoT community. There is no package management system and no binary packages, meaning updates to the system are not possible via packages. If a future release of the Linux kernel fixes a security vulnerability, a full system update would be required which would involve physically removing the SD card and updating the software manually. Best practices for building IoT devices include having an inbuilt mechanism from the word go, allowing for critical updates to be issued that threaten to compromise the device without having to rely on the end user to manually update their device.

All of this is subject to change I guess, Buildroot could one day change how they do things. For now I’m sticking with them as I’m the only one working on the dash project, but being the responsible security guy I am if I open up the project for others to tinker with I would want to switch to another project that supported some form of inbuilt updating.

Anyway it’s about time I get back to finishing rebuilding the engine for the Mk1 so I can actually test the dash in-car for once instead of on my desk!

Categories
Tech

MegaSquirt 3 Digital Dash

I am pleased to introduce a little side project that I have been working on the past few months. The projects initial main focus is to create a HD digital dashboard for the MegaSquirt ECU, to be built using as much off the shelf hardware as possible. This means that hopefully with some conscious design planning it should be possible to produce copies fairly easily just by following some documentation and ordering a few bits of the Internet here and there (This is the plan at least, who knows how things will pan out). Theres no reason other ECUs can’t also be supported in the future, however thats the only aftermarket ECU I have at hand and since thats what I run in my cars.

Project Brief

Create a digital dashboard that respects the character and history of the original cluster gauge, whilst also providing access to additional sensor readings that are important for any turbocharged engine.

And so after a bit of hard work this is what I have come up with for now..

Mk1 Escort Digital Dash
The original dash is on the left (front cover removed)

The dash features an 8 inch 1080P LCD display powered by a Raspberry Pi 2 (soon to be RPi 3) running a stripped down build of Linux to allow for fast booting. The dash communicates with the cars MS3 ECU via CAN bus and will include some additional power features that allow it to turn on/off safety via a switched ignition input.

The main motivation for having a digital dash is to take advantage of displaying all the extra sensor data the MS3 ECU utilises and accumulates. There are sensor outputs and ECU calculations that I would be interested in knowing whilst driving, but at the same time I don’t with to clutter the dash with additional gauges and dials as that would spoil the general aesthetics of the interior. Creating a digital dash in the same style as the original dials is a good compromise on having access to the data and not ignoring the originality of the car.

The development and install of the first dashboard will be a prototype version retrofitted into my Mk1 Escort. This type of instrumentation is something that I have wanted for many years, however it wasn’t until recently that I felt I had gained the right knowledge sets and courage to attempt such a project and not forgetting the funds to back. Believe me when I say this has been a long time in the works.

I will post more details on the project in the upcoming weeks but for now just wanted to give a glimpse into some of the more complicated long term projects I’m working on.

Categories
Tech

Fixing FreeNAS error: Currently unreadable (pending) sectors

I recently received a critical alert email from my FreeNAS box with the following error:

Device: /dev/ada3, Self-Test Log error count increased from 0 to 1
Device: /dev/ada3, 1 Currently unreadable (pending) sectors

Rather glad to know the email alerts I setup is working reliably, but looks as though I might have a few bad sectors on one of my drives.
The following commands resolved the error without resulting in any downtime.

The drive in question was /dev/ada3, so first login to a shell on your FreeNAS box as root and run a SMART long self-test (Replace adaX with your corresponding device).

smartctl -t long /dev/adaX

After the test has finished (It might take a few hours) view the results.

smartctl -a /dev/adaX

From the results remember the sector size and the location of the faulty sector (LBA_of_first_error).
In my case my sector size was 512 and LBA_of_first_error was 3082982872.

To correct the SMART error we will zero out the bad sector(s) on the drive, but first we need to permit access to drive.

sysctl kern.geom.debugflags=16

Now zero the sector stated in self-test results out.
Replace of=/dev/adaX, bs=512, seek=3082982872 with values relevant to your drive.

dd if=/dev/zero of=/dev/ada3 bs=512 count=1 seek=3082982872

Re-run the SMART report command to check if the ‘Current_Pending_Sector’ is now showing 0.

smartctl -a /dev/adaX

To check the ZFS file system integrity run a scrub of the pool, replace poolX with the pool name the drive is under (list pools with ‘zpool list’).

zpool scrub poolX

Finally check the output of the scrub to ensure there are no known data errors.

zpool status -v poolX
Categories
Tech

Circus Ponies Notebook is no more

Circus Ponies logo

This afternoon I went on over to Circus Ponies to download a fresh copy of Notebook for a new HackPro of mine, and was presented with this lovely notice.
Thanks for all the fish

Well that was a bit out of the blue, and with no prior notice. No emails, no heads up, no nothing.

Circus Ponies announced today that they are closing up shop, having been acquired by Google. They had been the creators of a fab piece of note taking software called Notebook. It really was a simple bit of kit that did was it was meant to do and nothing more, I used it in conjunction with Owncloud to privately host my project notes which automatically synced between my various computers. Not sure why Google would want their hands on it yet, perhaps to improve their own suite of Apps capable of note taking.

Now begins the joyous task of finding something else that will fit the bill. I had been considering for a while about hosting my own internal wiki to accomplish the same role as Notebook, the only niggle with that idea is I often find myself without a reliable Internet connection (trains) and don’t want to be sat stranded not being able to do work simply because I don’t have the relevant project notes handy.

Anyways It’s not as if the app is crippled without online functionality as it doesn’t really have any. So in the meantime I will continue to use until I can find a suitable replacement or Apple releases an update with breaks compatibility.
That really will be the last nail in the coffin for Notebook.

Categories
Tech

FreeNAS Mirror Boot Device Error: device is too small

SanDisk Cruzer Fit 32GB USB 2.0

Now that my FreeNAS install has been running for some time in ‘Production’ with no problems, I decided to do a little housekeeping to help offset potential downtime by creating a mirror for the USB boot drive incase it fails one day.

The option to create a mirrored boot drive is presented during the initial FreeNAS install, however I didn’t have another USB of the same make/model handy at the time. Fast forward to the present, having now found a spare USB that is identical to the one already installed (SanDisk Cruzer Fit USB 2.0 32GB) it was time to finish the job.

REGIUS USB
There’s a spare in there somewhere.

FreeNAS’ excellent documentation quickly goes over the process of retroactively creating the mirrored drive. Which seemed easy enough until I ran into the following error.

MiddlewareError: Failed to attach disk: cannot attach da1p2 to da0p2: device is too small

Cut a long story short after a couple hours of messing around with both USB drives, I discovered the new drive was ever so slightly smaller in capacity than the original even though both are 32GB. According to the documentation the new drive must either the same size or larger than the original, I didn’t realise it was just so picky on exact capacity.

dan@freenas /% gpart show
=>      34  62530557  da0  GPT  (29G)
        34      1024    1  bios-boot  (512k)
      1058         6       - free -  (3.0k)
      1064  62529520    2  freebsd-zfs  (29G)
  62530584         7       - free -  (3.5k)
=>      34  61055997  da1  GPT  (29G)
        34      1024    1  bios-boot  (512k)
      1058         6       - free -  (3.0k)
      1064  61054960    2  freebsd-zfs  (29G)
  61056024         7       - free -  (3.5k)

As you can see in the above snippet da0 has a total of 62530557 blocks compared to da1 which has a total of 61055997 (meaning da0 > da1).

After some more messing around and speaking to some folks on FreeNAS’ IRC I decided to do a reinstall of FreeNAS onto the smaller drive. I backed up my FreeNAS config (System -> General -> Save Config), shutdown the server, disconnected all my WD Red’s so they couldn’t interfere with the installation and began the fresh install.

Once complete, I restored the config (System -> General -> Upload config -> Reboot) and reconnected the WD Red’s to double checked the ZFS volume was still okay (precious precious data). With everything back up and running I installed the other USB stick and tried once again the mirroring process (System -> Boot -> Status -> freenas-boot -> Attach), which I’m happy to report completed successfully after a few minutes.

FreeNAS Boot drive mirrors

Hopefully this is one resiliency feature I won’t have to rely on anytime soon, but one can never be too careful and there is no real excuse with USB drives being so cheap nowadays.
FYI 32GB is overkill really for a FreeNAS boot drive, 16GB will suffice just fine.