Categories
Tech

Setting up PiDuino with Raspbian Buster

Years ago I bought myself a PiDuino from SK Pang with the original intention of using it as a power management board for my digital cluster project (ended up using a SleepyPi 2 in the end) and so hadn’t touched it for a few years, below are my notes on getting it working under Raspbian Buster on a RPi 3B+ in April 2020.

The original assembly guide is still relevant for soldering the board together, as well as the instructions for setting up and testing the software, especially Gordons instructions

In summary I performed the following:

Install Arduino and installed a modified version of avrdude (this might not be needed anymore as the standard avrdude could work, but didn’t test).

sudo apt-get update && sudo apt-get upgrade
sudo apt-get install arduino

cd /tmp
wget http://project-downloads.drogon.net/gertboard/avrdude_5.10-4_armhf.deb
sudo dpkg -i avrdude_5.10-4_armhf.deb
sudo chmod 4755 /usr/bin/avrdude

Next regain control of the serial port by removing console=ttyAMA0,115200 from ‘/boot/cmdline.txt’

sudo nano /boot/cmdline.txt

We also need to edit ‘/boot/config’ and add a couple lines to reconfigure the serial port

sudo nano /boot/config.txt

And then add at the bottom:
dtoverlay=pi3-disable-bt
uart_enable=yes

Then stop the Systemd getty service and disable it from starting on boot with, followed by a reboot

sudo systemctl stop serial-getty@ttyAMA0.service
sudo systemctl disable serial-getty@ttyAMA0.service
sudo reboot

Then following more instructions from Gordon, add the custom board and programmer entries into Arduino (you might be able to get away with just adding the custom programmer entry if you’re just interested in flashing the PiDuino using the RPi pins).

cd /tmp
wget http://project-downloads.drogon.net/gertboard/boards.txt
wget http://project-downloads.drogon.net/gertboard/programmers.txt
cd /usr/share/arduino/hardware/arduino
sudo mv boards.txt board.txt.bak
sudo mv /tmp/boards.txt .
sudo mv programmers.txt programmers.txt.bak
sudo mv /tmp/programmers.txt .

With that all the software should be setup ready for use, connect the Piduino to the RPi header and fire up Arduino.

Set Tools -> Board -> Arduino Pro or Pro Mini (3.3v, 8 MHz) w/ ATmega328

Set Tools -> Programmer -> Raspberry Pi GPIO

You can now upload example programs such as ‘Blink’ to test that the upload functionality is working okay, be sure to use upload using programmer instead of just clicking the regular upload button

Select File -> Upload using programmer

When I did this I found that the example ‘blink’ project was running but very very slow, taking approximately 5 sec’s for the LED to blink. This can occur when the bootloader hasn’t been set, this is easy to fix by burning the boot loader.

Select Tools -> Burn Bootloader

With that the blink project should blink at the correct speed and everything is all setup and ready to go.

Categories
Tech

Deck Chair Repair (using a 3D printer)

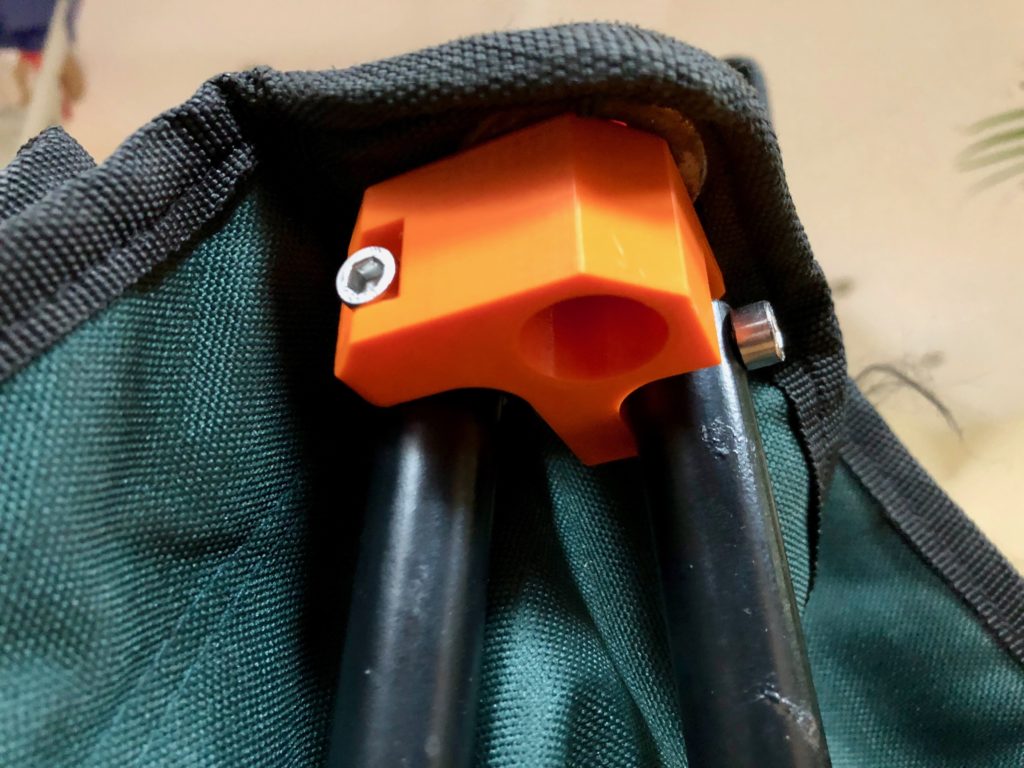
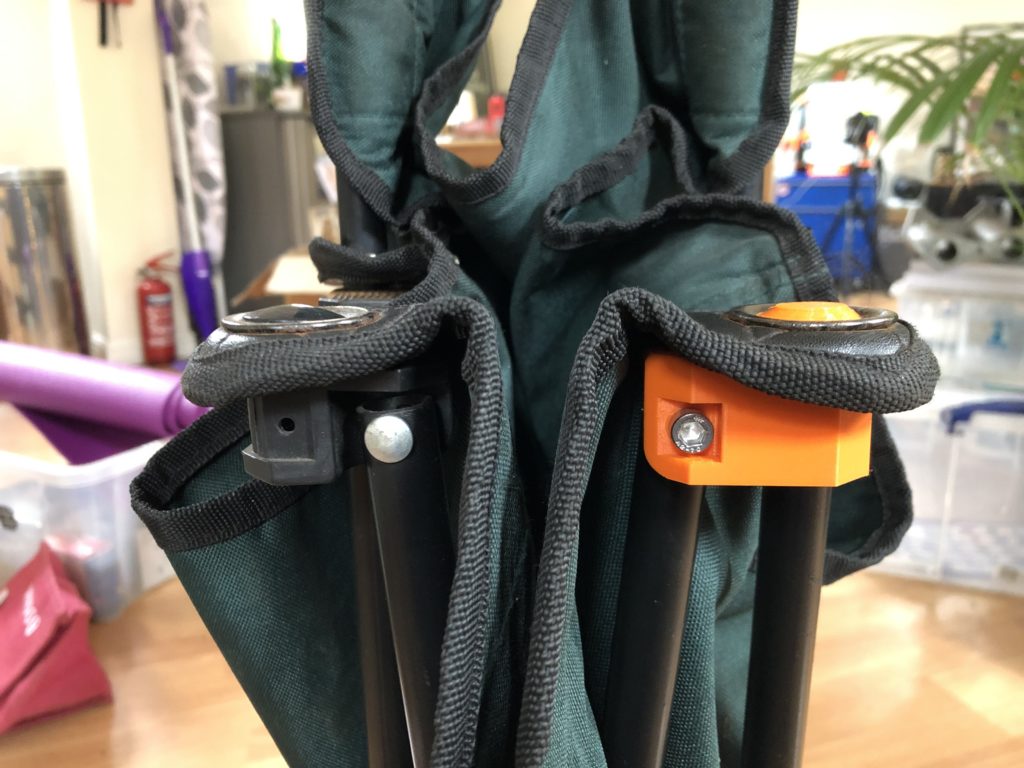
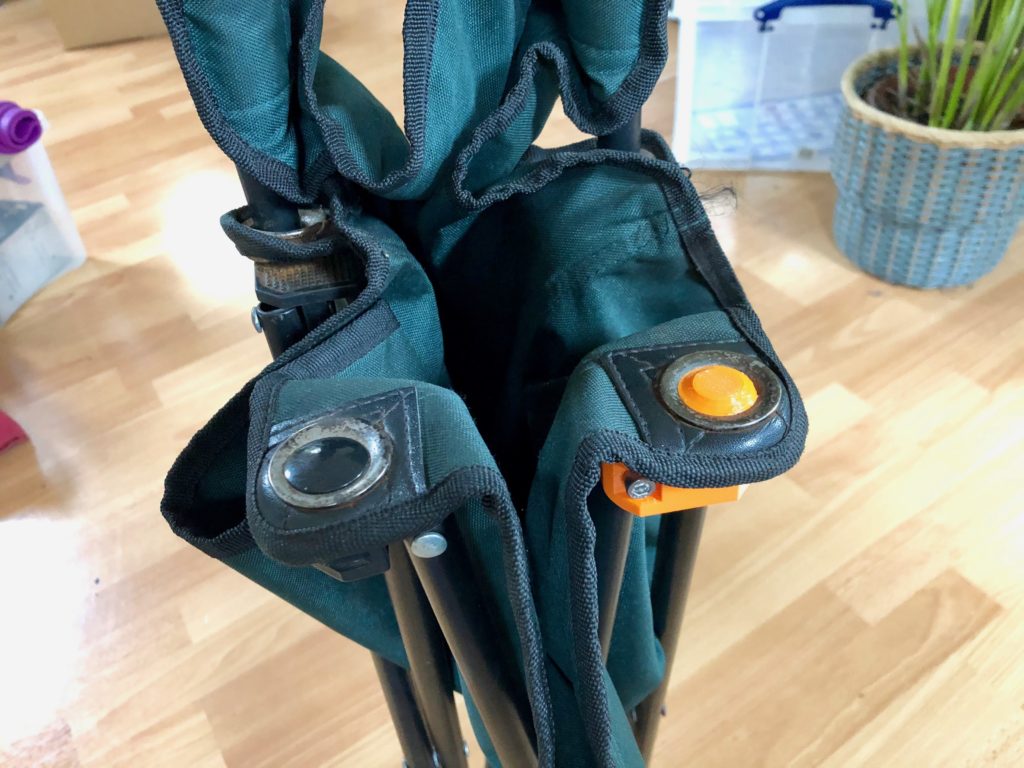
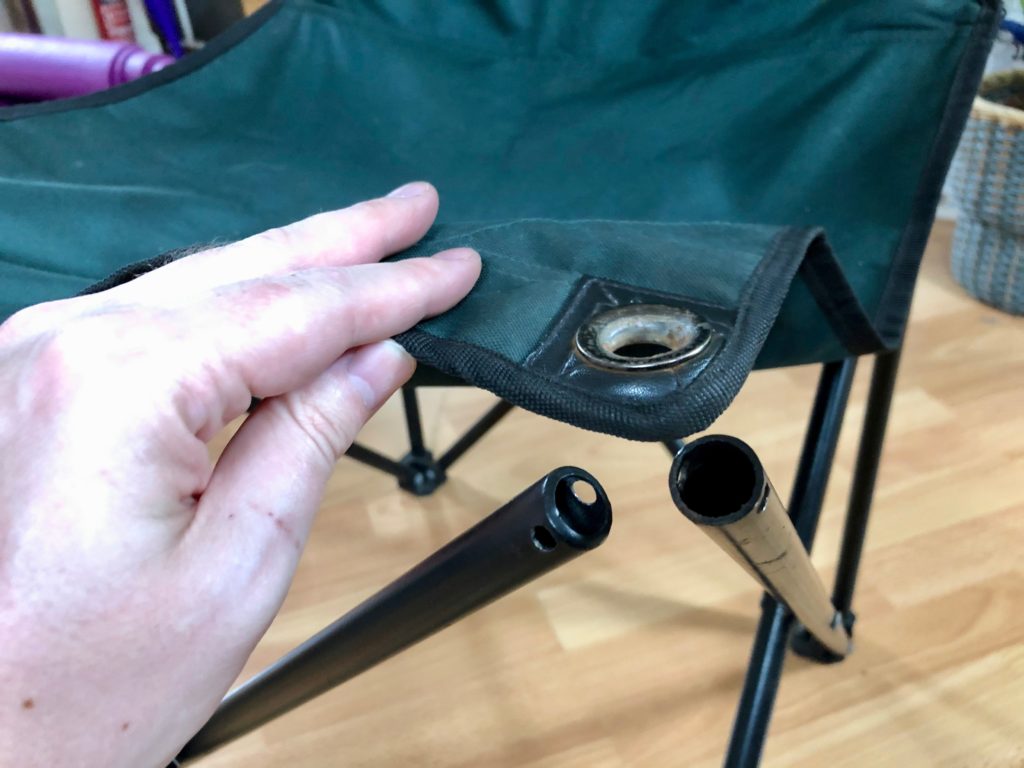
One of the folding chairs (aka thinking stools) I have in the garage broke recently, rather than chuck in the bin I thought it would be good practice to 3D model replacement parts and then make using a 3D printer. By good practice, I mean testing my Fusion360 skill are ‘good enough’ to the point where it would be more cost effective to model/print versus simply buying a new chair, depends on how much you value your own time I guess.

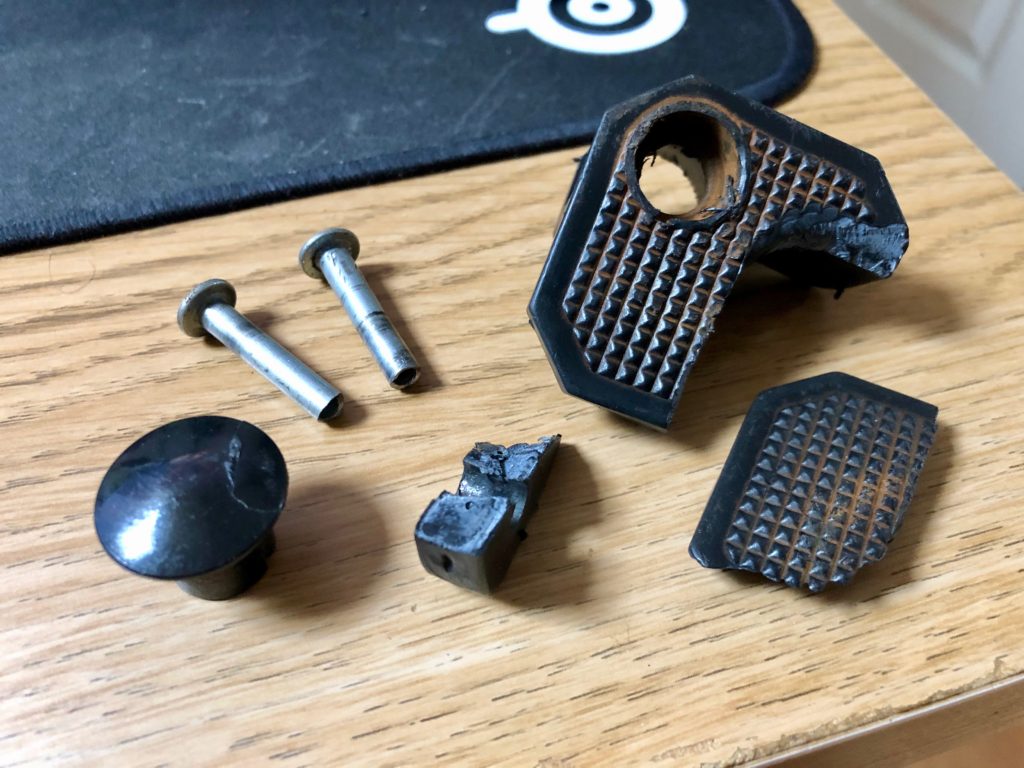
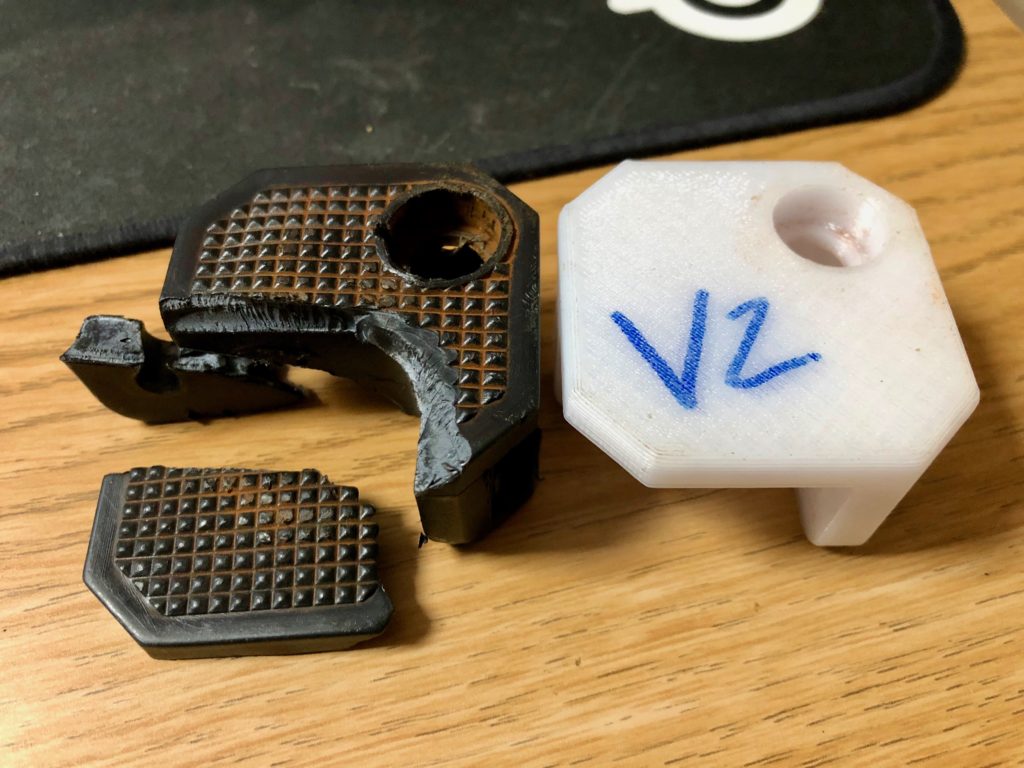
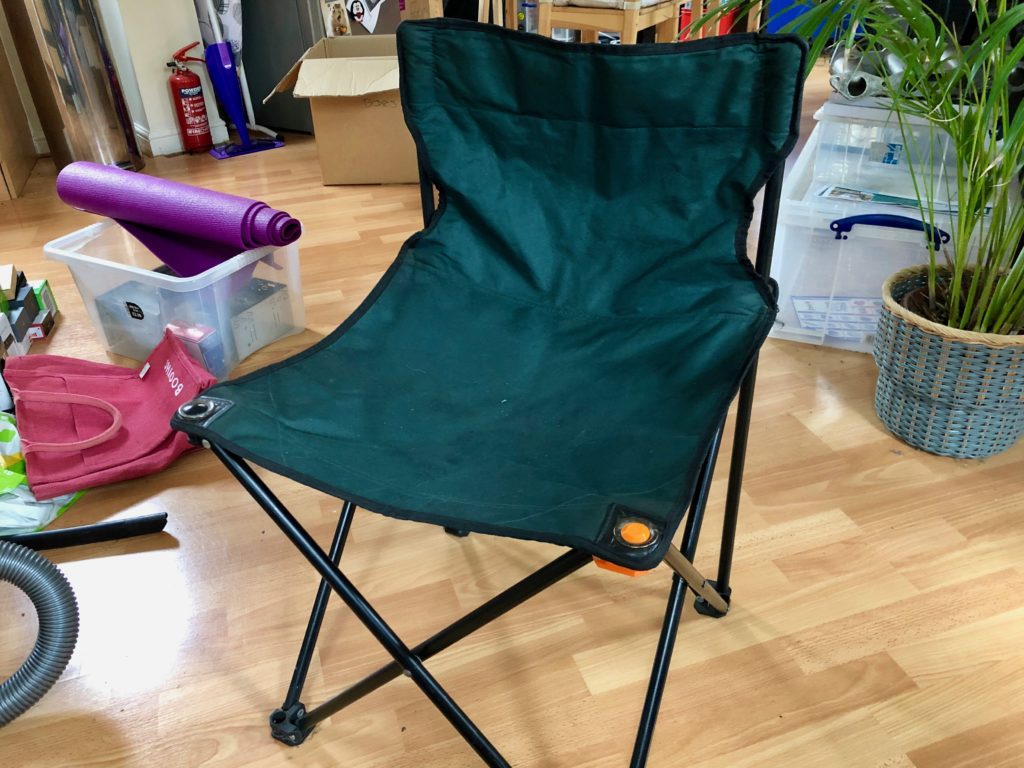
One of the corner brace/brackets snapped off
The original bracket was held in place using rivets
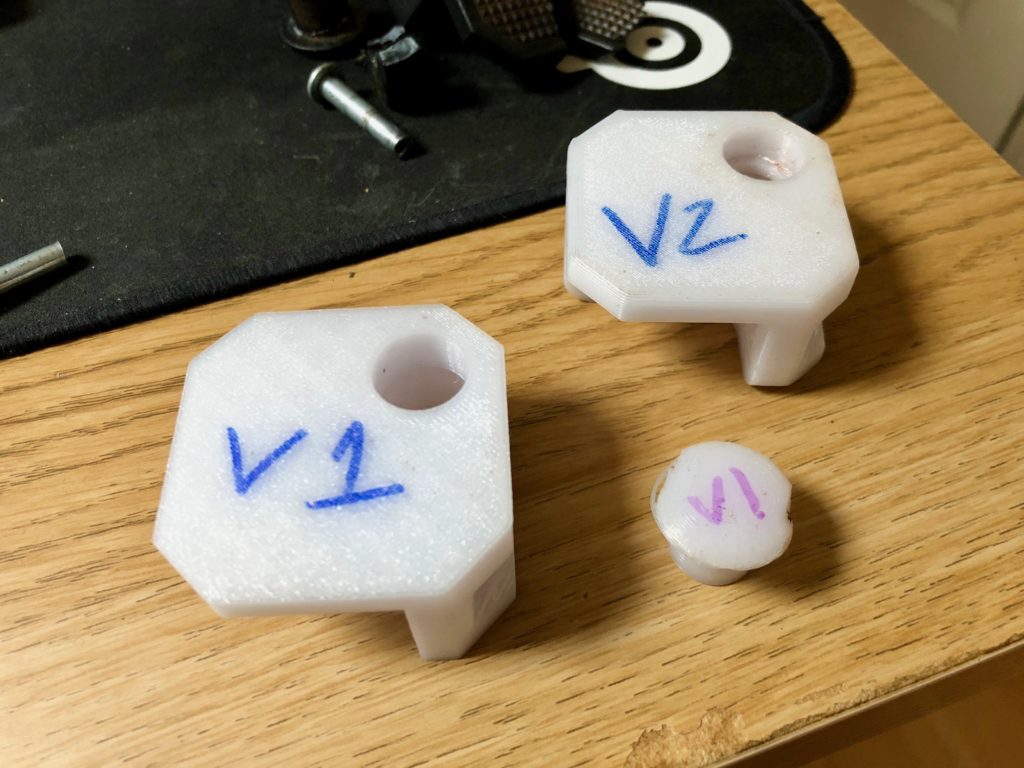
The design went through a few iterations, was happy to have gotten majority of the design right in v1
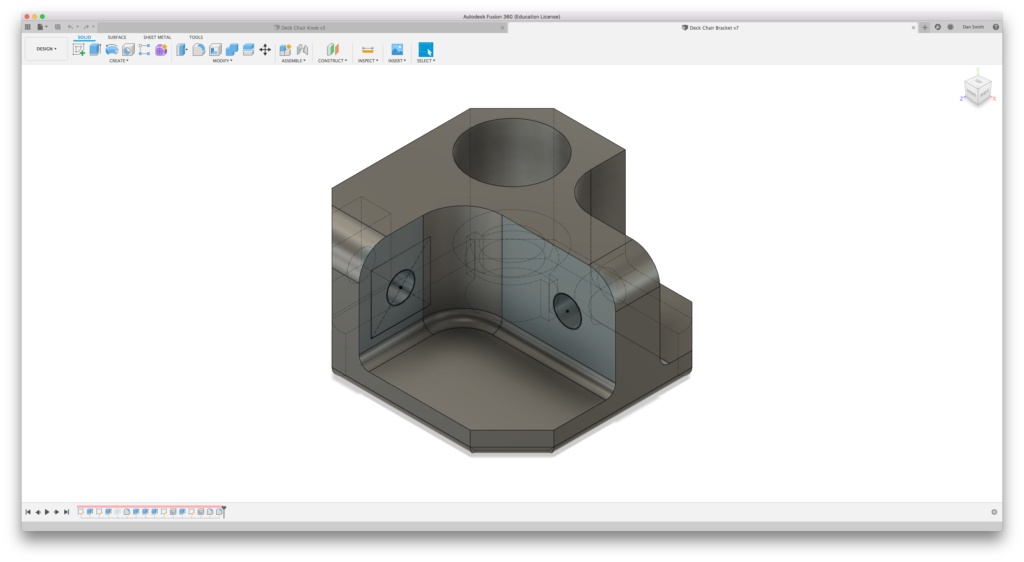
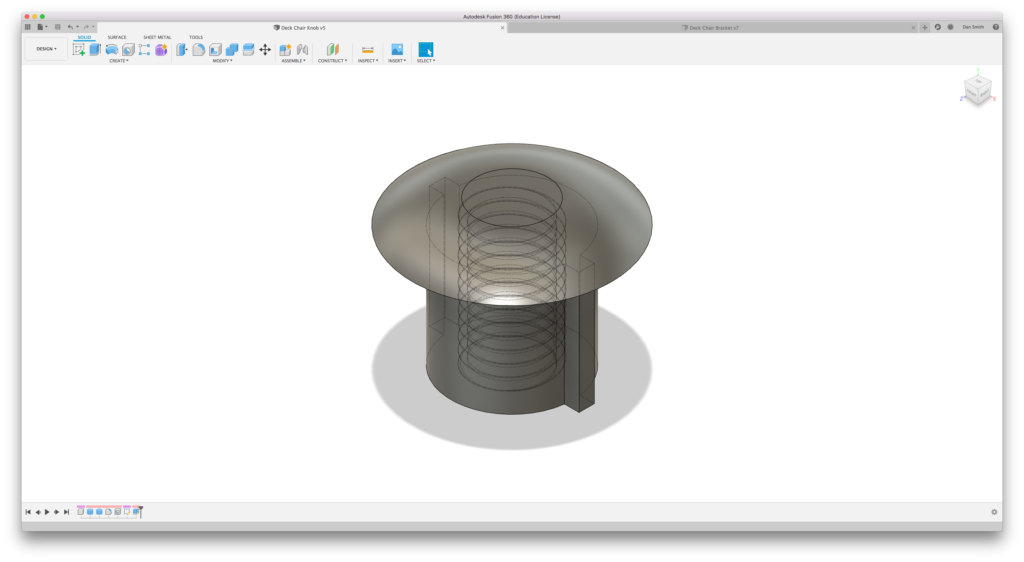
Model I created of the bracket in Fusion360 (bracket is upside down in screenshot)
Top piece which inserts into main bracket, you can see the M8 thread modelled internally.
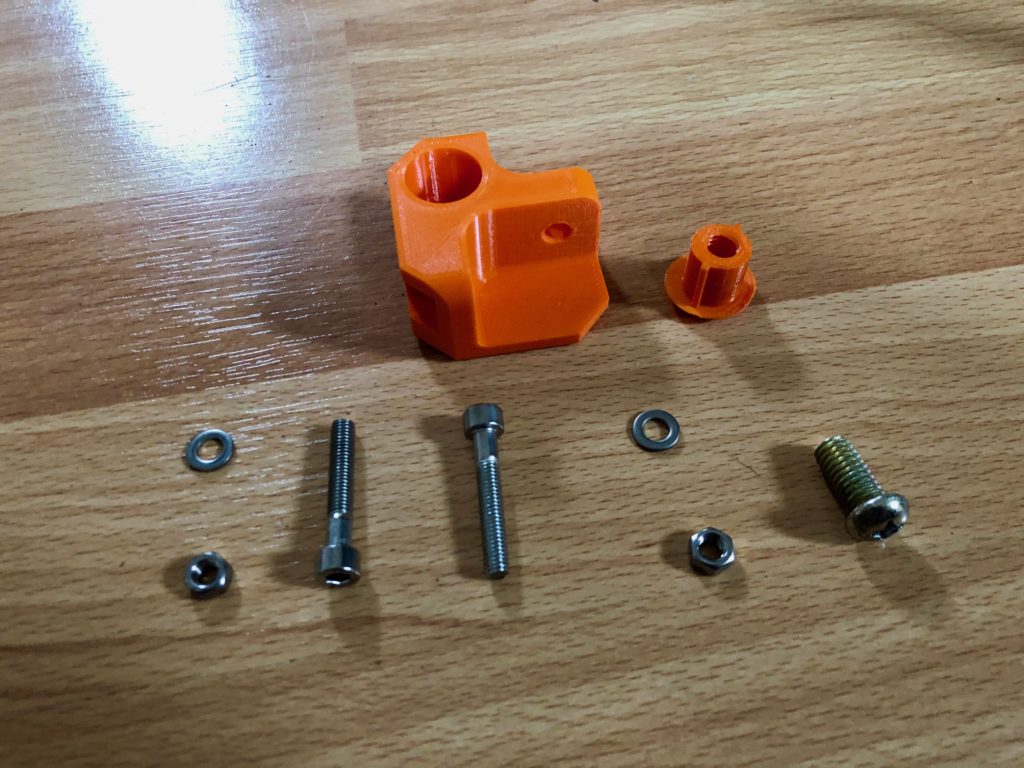
Ready for functional testing
Used bolts in place of rivets, probably should of also used nylock nuts
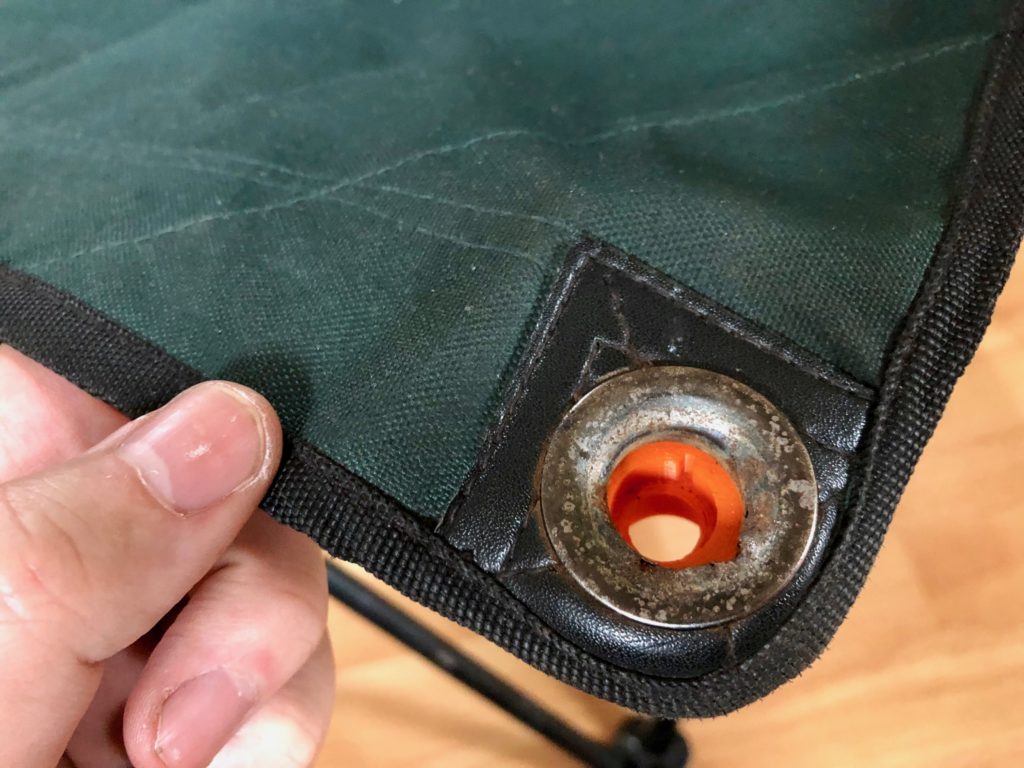
Had to open up the holes left from the rivets in order to get the bolts to fit
The mushroom sleeve plastic thing has a bolt that screws in underneath which grips the chairs material, this was printed with an M8 x 1.5mm thread modelled by Fusion360, the M8 bolt screwed into the printed thread just fine.
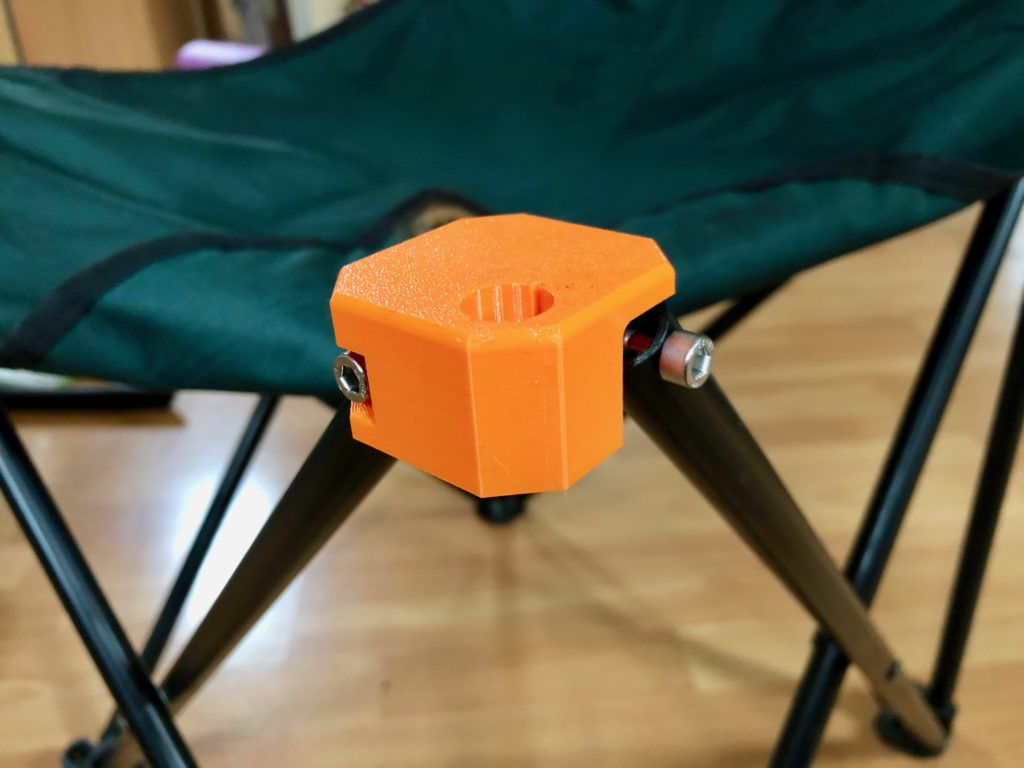
The finished piece, probably should have printed this in Carbon Fibre reinforced Nylon as its a structural part taking the full weight of a person. Will be interesting to see how long it holds currently as PETG.

In the end it probably was about half an hours modelling time, and a few hours print time for a total of 3 iterations, it was worth it in the end just as a fun experiment, turns out I can model pretty quick when I have to.

Categories
Tech

Swap Speaker Output Channels in macOS

How my cheapo Logitech speakers are setup on my desk in relation to my Hackintosh computer means the right speaker is actually on the left side of my side and the left is on the right. This is due to the 3.5mm input cable built into the right speaker not being long enough to reach the computer when positioned on the right side.

Luckily within macOS, Apple make it super easy to switch output channels, so left is right and right is left.

From Finder open the Audio MIDI Setup app which can be found in
Applications -> Utilities -> Audio MIDI Setup.app

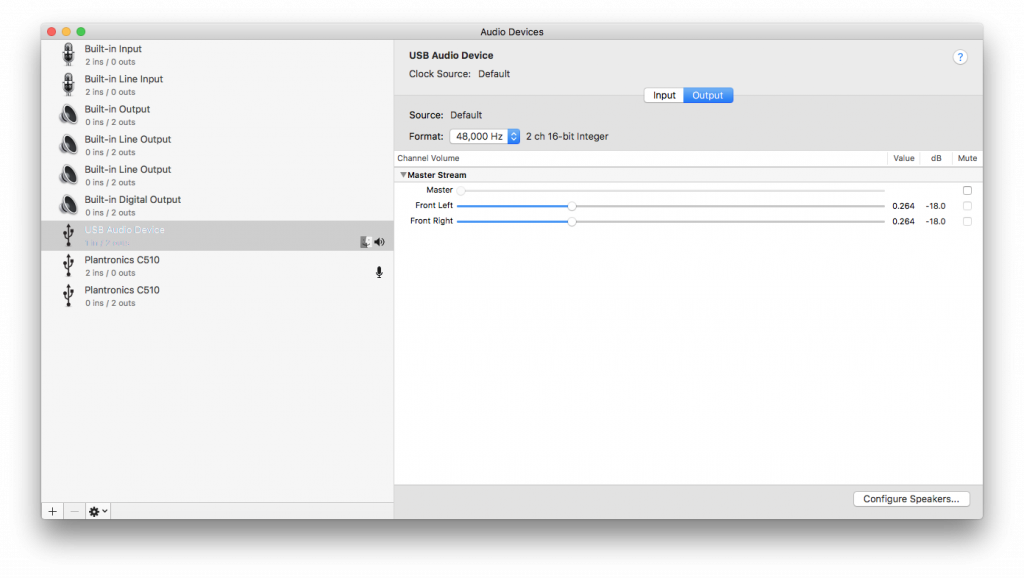
  1. Select your current output device, in my case this is ‘USB Audio Device’ but yours will likely be ‘Built-in Output‘.
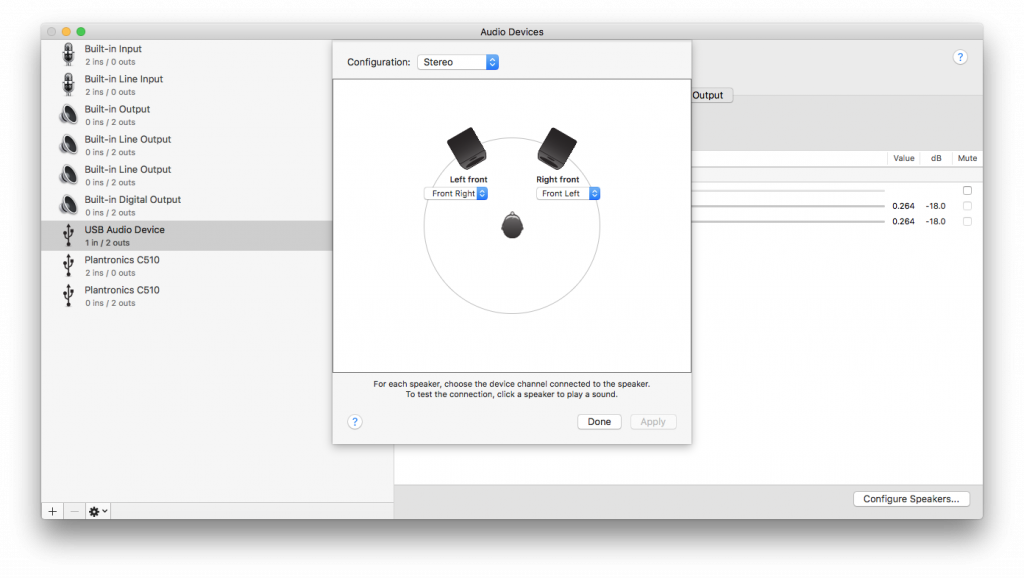
  2. Click ‘Configure Speakers‘ located at the bottom right.
  3. Then it’s simply the matter of setting the left front to the front right and the right front to the front left.
  4. Click ‘Apply‘ then ‘Done’ and close. 
  5. Test audio output channels are correct by finding a sound test video on YouTube. 
Categories
Tech

Configure Sony XAV-AX100 Steering Wheel Controls for a Ford Mondeo

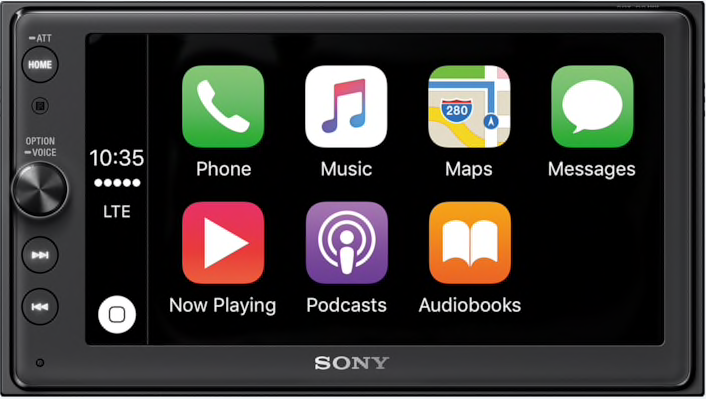
Sony XAV-AX100

Intro

This summer I picked up a Sony XAV-AX100 head unit to replace the stock Blaupunkt TravelPilot EX in my 2004 Ford Mondeo Mk3. The Blaupunkt was slowly disintegrating with age and suffered from annoying issues like being able to hear a high pitched whine in sync with engine speed (I actually thought it was the turbo whistling the first time I heard it). In comparison; the XAV-AX100 is cheap, has both Apple CarPlay and Android Auto, has a minimal and flat native UI meaning it should age well with time and is still receiving regular firmware updates from Sony.

I was about to undertake the long drive to Edinburgh and thought the 16 hour return trip would be more than enough to test out the unit. It was purchased from Halfords for ease of return incase I didn’t like it. Also this was early Friday evening and I was due to drive to Edinburgh Saturday morning, so I installed the radio on Halfords carpark as I knew I’d need some adapter cables but didn’t know which ones.

The head unit installation was simple enough however the steering wheel controls for volume up/down, seek next/back and mode selection didn’t work. This post covers how I got the steering controls fully working and documents a couple of mistakes I made along the way which could save time and effort for those reading.

Mistake #1 – Purchased incomplete harness adapter

During the initial install at Halfords I ended up using two adapters; a quadlock to ISO adapter for the main harness and a ISO female to DIN male adapter for the radio antenna.
Whilst this adapter did the job to get the radio working in time for my trip, it doesn’t include the necessary connector blocks and terminals pins inside the quadlock to interface with the steering wheel controls.

If we check the pinout of the quadlock connector on the Ford harness, the pins we are interested for steering wheel controls is pin 6 (SWC) and pin 8 (SWC Gnd) located on connector B.
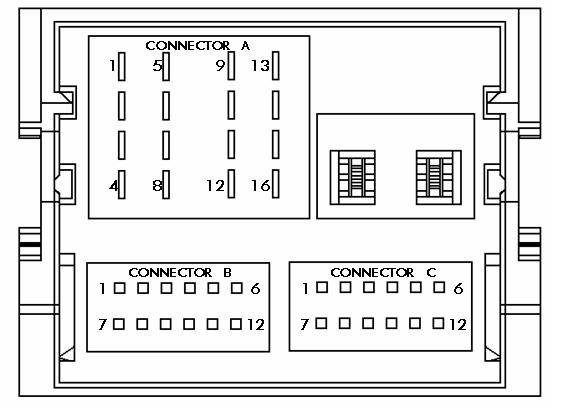
Ford Mondeo quadlock connector

As you can see below the Halfords adapter has a gap inside the connector where the missing connector block should be (image has been rotated to match pinout orientation). Obviously using adapter isn’t going to result in working steering wheel controls in its current form.
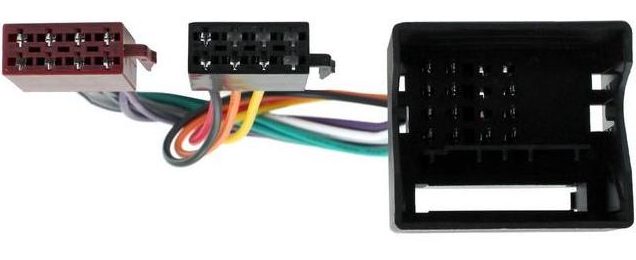
Quadlock to ISO Ford Adapter

Ford Steering Wheel Controls

Up to this point I’d identified the pins relating to steering wheel controls on the Ford harness but I didn’t know how when I pressed a button on the steering controls that was signalled to the headunit. Before I’d removed the stock Ford radio my gut instinct was this would all be CAN-bus or LIN-bus controlled however when looking back at the pinout on the Ford quadlock, pins 9 and 10 on connector A are responsible for CAN and I very much doubted a car as old as mine would have multiple CAN networks.

The diagnostics wiring diagram in Autodata for my specific Mondeo model verified that there was only one CAN network and so everything was on a flat network, great this makes it super simple to sniff traffic.

I confirmed that the controls wen’t CAN based by hooking up a Macchina M2 to the OBD port and firing up SavvyCAN to filter through CAN frames as I was pressing buttons on the steering controls with the IGN on/engine off. Nothing in the filtered traffic showed showed a timing pattern inline with when I was clicking the steering controls, so this ruled CAN out for me.

I then stumbled across this very useful post which indicated the Ford steering controls used a simple resistor ladder as shown below.
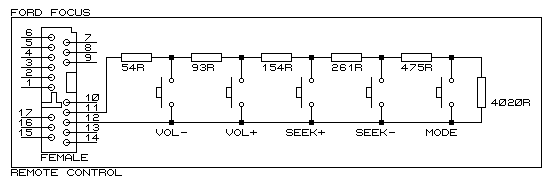
Ford Steering Controls Schematic

The author of the post was writing about connecting his older Sony radio to his Ford Focus, and he’d come up with a small microcontroller to handle the difference in Ford’s resistance values to ones the Sony radio would correctly understand. At this point I figured I’d need something along the lines of one of these micro controllers… I would turn out to be wrong.

Mistake #2 – Headunit 3.5mm remote control jack

Now that I’d figured out what was going on from the Ford harness side, it was time to do the same for the headunit.

The steering controls aren’t passed to the headunit using the ISO connectors like the rest of the wires, instead it has a dedicated 3.5mm audio style jack that it is used for ‘steering wheel remote control’ according to the XAV-AX100 user guide. Sony doesn’t specify any further instructions on how this can be wired up other than to contacting your local auto audio professional for more guidance.

The user guide does mention that the RC-SR1 connection cable as the only other related part, but I couldn’t find that exact Sony part available in the UK.
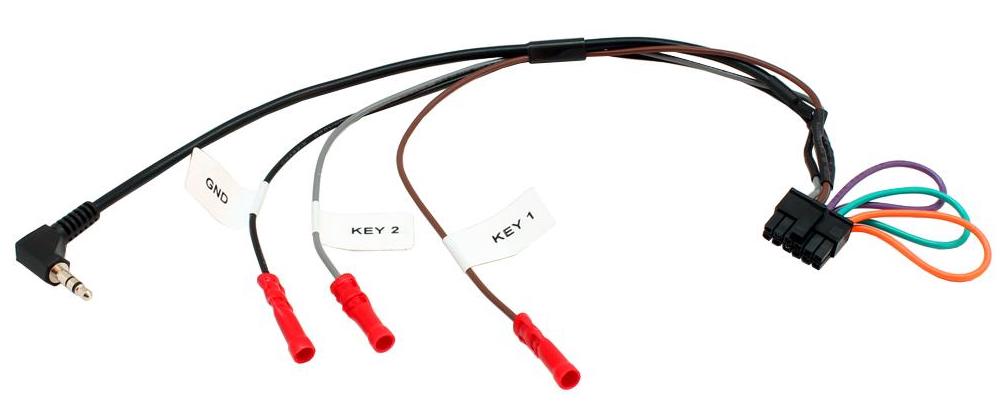
However searching for this part did lead me to this product on eBay (manufacturer product info) which appeared to solve all my issues, a new harness with all the correct blocks and pins in place and a microcontroller to translate the Ford resistance values to ones Sony headunits can understand and included the 3.5mm remote jack connector!
CONNECTS2 Ford Mondeo Mk3 Steering Stalk Control Adaptor
Sony Headunit 3.5mm Patch Cable

I ordered and installed the new adapter harness. It appeared to be a universal product made to work with several headunit brands, the instructions claimed it worked out of the box with Sony which turned out to be partially true as only volume up/down would work. This confirmed it was at least possible to get something from the Mondeo steering controls working with the XAV-AX100 which I was happy about.

With some further tweaking in the Sony settings there is an option to configure custom steering controls, once selected you enter a wizard where you press and hold the action on-screen you wish to configure (e.g. seek forward), then you press and hold the physical button on the steering controls, after a few seconds the headunit registers the button press and prompts for the next button. This took a while to figure out and the instructions didn’t help clarify the steps required here, but through this method I was able to get the volume up/down and seek next/back buttons working. However I was unable to get the mode button working which was frustrating.

It was only after doing this process that it occurred to me that newer Sony headunits are capable of dynamically adapting to whatever steering controls are present in your vehicle by reading the resulting voltage from each of the button presses (altered by resistor ladder) and storing them in memory. A much more elegant solution than hardcoded values and therefor the microcontroller isn’t needed for this setup to work…

Final setup

I removed the microcontoller from the setup but left the new harness adapter in place. Using a multi meter I figured out which wires on the 3.5mm patch cable correspond to the 3.5mm jack positions and added in a couple of temporary jumper wires to complete the circuit. Yo behold after going through the steering control wizard one more time I was able to get all buttons working, using a much simpler harness too now that the microcontroller was not needed.

This is how its hooked up:

  • Ford harness, Pin 6, Connector B -> Pink wire -> Black wire -> Innermost 3.5mm jack position (Closest to black plastic boot/strain relief)
  • Ford harness, Pin 8, Connector B -> Brown wire -> White wire -> Outermost 3.5mm jack position on (Furtherest away from black plastic boot/strain relief)

Some photos to illustrate the setup.
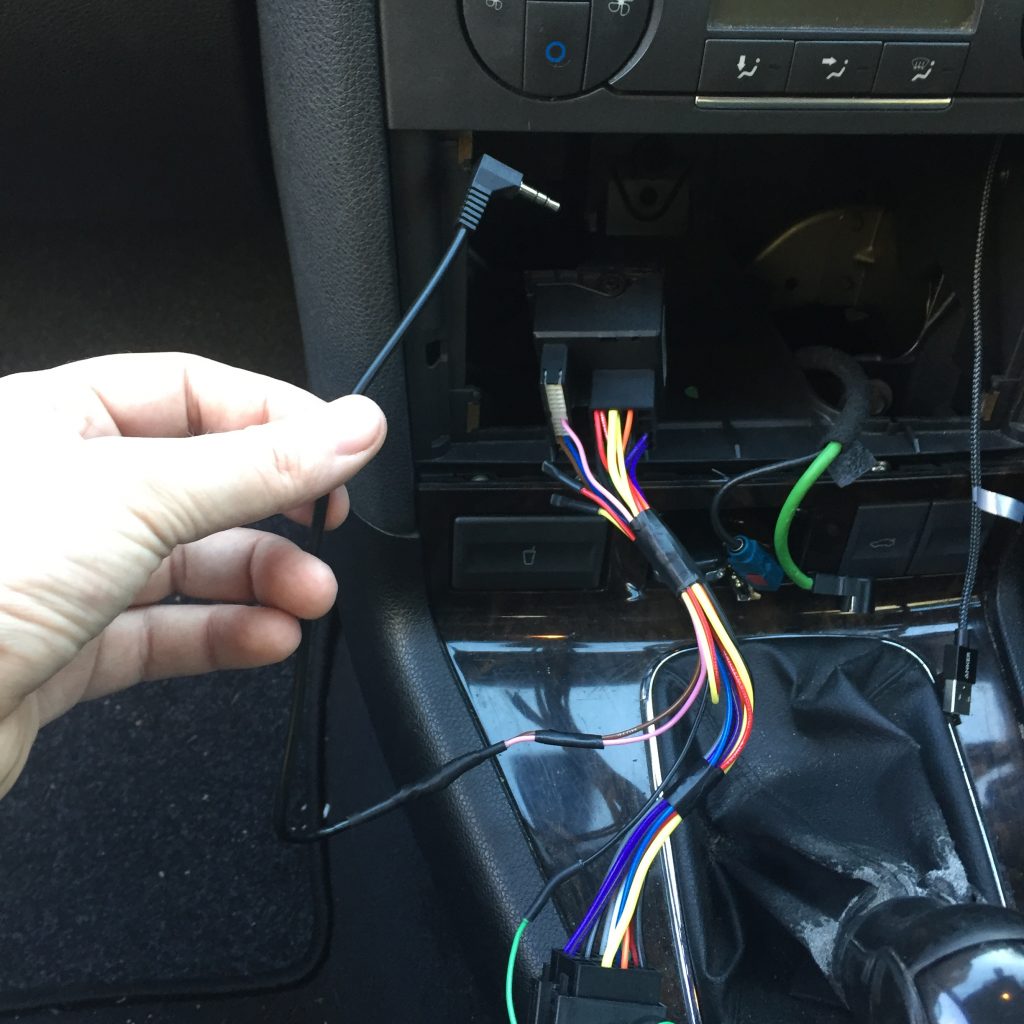
Hacked Mondeo Steering Controls Harness 1
Here you can see the pink and brown steering control wires directly connected to the 3.5mm jack (no microcontroller or anything else in between)>
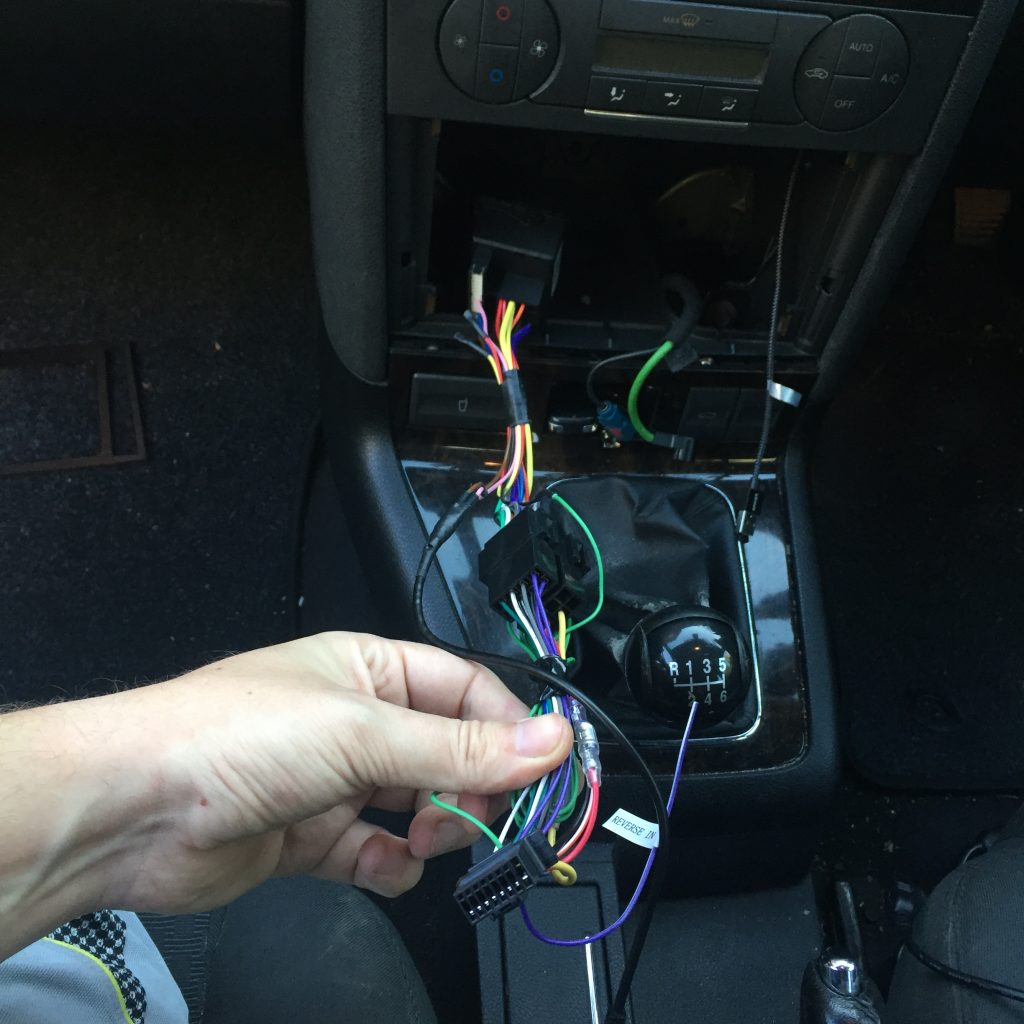
Hacked Mondeo Steering Controls Harness 2
I cut off the two connectors for the microcontroller and removed any unnecessary dangling wires to simplify the harness.
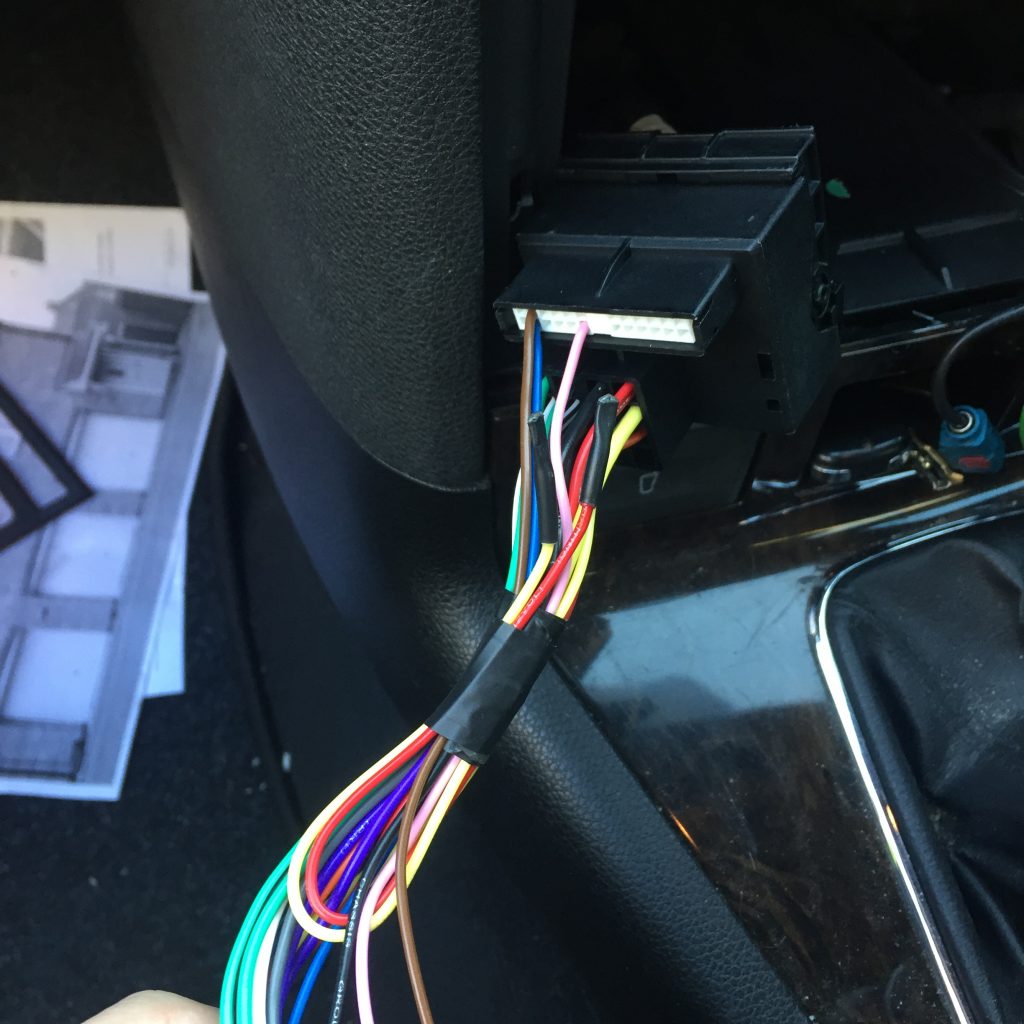
Hacked Mondeo Steering Controls Harness 3
The spare permanent live and switched IGN wires were kept as handy future spares and the handbrake switch was connected to the spare Gnd (Android Auto requires the handbrake switch to be connected).
Categories
Tech

Fix LastPass Binary Component for Safari

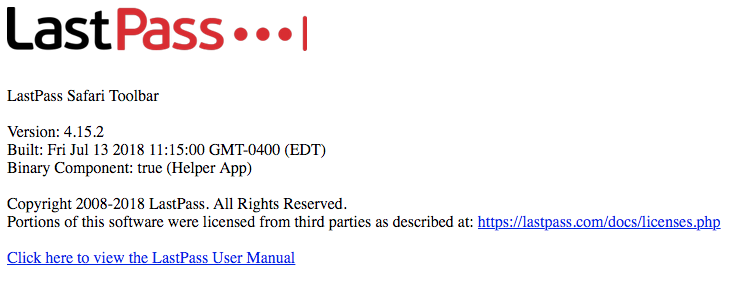
No matter how many times I tried I couldn’t get the LastPass binary component to show as working in Safari on my Mac. Even after reinstalling the latest version of LastPass (as of August 2018) numerous times I couldn’t get the binary component for Safari working. Clicking the LastPass toolbar icon -> ‘More Options’ -> ‘About LastPass’ confirms the binary component wasn’t loading (Will show false instead of true, as I just fixed mine).

LastPass About Binary Component

I did find a post that reported a fix for this issue, however the linked fix was only documented in a set of images that are currently broken (not helpful). Luckily there is a web archive that contains a snapshot of the images, however I’ll document the simple fix here also for future reference.

Editing the Lastpass plist file

Using Finder navigate to the hidden folder (Finder shortcut = shift + cmd + g)
~/Library/LaunchAgents/

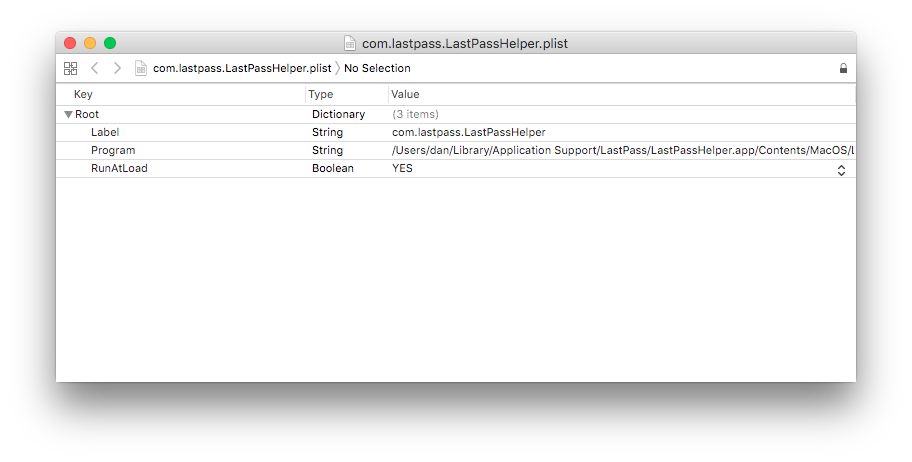
Open the com.lastpass.LastPassHelper.plist in a text editor (Needs admin privileges IIRC) and change the ‘Program’ entry that contains “REPLACE_HOME/Library/Application..” to reflect your Mac OS account’s username (which should be the same as your users home directory, e.g dan).

LastPass binary component fix

Checking the about page again should result in a working binary component.

Update Nov 2018

Incase it’s still not working double check that the LastPassHelper.app is listed in your users login items which can be found in system preferences -> users & groups -> login items.
Be sure to add it if it’s not listed.
The helper app is located at ‘~/Library/Application Support/LastPass/LastPassHelper.app’.