Categories
Tech

Spacewalk 2.4 installation on CentOS 7

Spacewalk logo

Spacewalk (not the EVA kind) is an open source (GPLv2) Linux systems management solution and is the upstream project for Red Hat Satellite. The main feature I wished to experiment with was the ability to manage multiple systems packages (upgrades) concurrently. The project also has several other main features, including;

  • Inventory your systems (hardware and software information)
  • Install and update software on your systems
  • Collect and distribute your custom software packages into manageable groups
  • Provision (kickstart) your systems
  • Manage and deploy configuration files to your systems
  • Provision and start/stop/configure virtual guests
  • Distribute content across multiple geographical sites in an efficient manner

Prerequisites

Taken directly from the official Spacewalk docs:

  • Open outbound firewall ports 80, 443
  • Inbound open ports 80, 443, 5222 (covered below later on)
  • Storage for database: 250 KiB per client system + 500 KiB per channel + 230 KiB per package in channel (i.e. 1.1GiB for channel with 5000 packages)
  • Storage for packages (default /var/satellite): Red Hat recommend 6GB per channel for their channels, I used 20GB for storage, as 10GB wasn’t enough
  • 2GB RAM minimum, 4GB recommended
  • Fully up-to-date underlying operating system running a vanilla installation (no user customisation performed yet, fresh system install)

Setup Repos

There are 3 main repos to setup.

Spacewalk repo

rpm -Uvh http://yum.spacewalkproject.org/2.4/RHEL/7/x86_64/spacewalk-repo-2.4-3.el7.noarch.rpm

JPackage

cat > /etc/yum.repos.d/jpackage-generic.repo << EOF
[jpackage-generic]
name=JPackage generic
#baseurl=http://mirrors.dotsrc.org/pub/jpackage/5.0/generic/free/
mirrorlist=http://www.jpackage.org/mirrorlist.php?dist=generic&type=free&release=5.0
enabled=1
gpgcheck=1
gpgkey=http://www.jpackage.org/jpackage.asc
EOF

EPEL

Spacewalk requires Java Virtual Machine 1.6.0 or greater which is available in the EPEL repo.

rpm -Uvh https://dl.fedoraproject.org/pub/epel/epel-release-latest-7.noarch.rpm

Installation

Time to get on with the install 🙂

Database backend

Spacewalk uses database server to store its primary data. It supports either PostgreSQL (version 8.4 and higher) or Oracle RDBMS. Lets install PostgreSQL and let Spacewalk configure the database for us.

yum install spacewalk-setup-postgresql

Install Spacewalk

Install the Spacewalk package with support for PostgreSQL.

yum install spacewalk-postgresql 

Configure the firewall

Enable inbound firewall (firewalld) ports 80 (http) and 443 (https).

firewall-cmd --add-service=http
firewall-cmd --add-service=https

Configure Spacewalk

Last step.

spacewalk-setup --disconnected

Afterwards we should be able to visit: https://hostname.yourdomain.com to create the Spacewalk admin account and finish the installation.

Categories
Tech

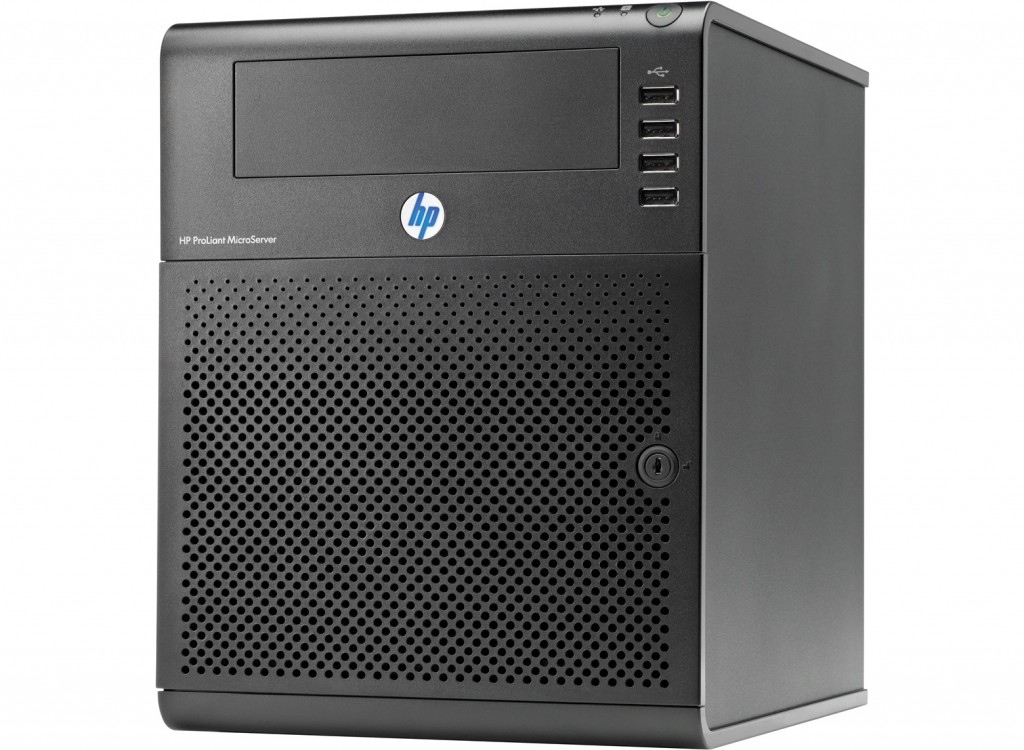
Cheap server for home lab – HP ProLiant N54L MicroServer (with cash-back offer)

HP MicroServer G7

This post would of been more relevant a few months ago but earlier this year I was sent a link for HotUKDeals, there was an offer going to buy a HP ProLiant G7 N54L MicroServer for £97.94 (£263.94 with £166 cash back). The deal is now expired but can be found here anyway.

This is a nifty little server for the price; 2.2GHz AMD Turionâ„¢ II Neo N54L dual-core CPU, 2GB DDR3 ECC RAM, 250GB HD and 150w PSU. The great thing is the CPU includes support for virtualisation through AMD-V, allowing you to run fully-virtualised guests within bare-metal hypervisors like Xen.

The N54L states 8GB is the maximum amount of RAM supported, however after a bit of researching I came across a few articles claiming that 16GB is possible. I can confirm that my MicroServer is running 16GB. Amazon sell Kingston 16GB (2x8GB) DDR3 1333Mhz with ECC support for £119.56 at the time of writing, the link for Amazon UK can be found here

Categories
Tech

Auto-starting guest VM’s using Virsh

Running this command for each individual VM, will ensure that they are automatically started and suspended when starting up and shutting down your server.

Enable autostart for VM.

sudo virsh autostart guest-vm-name

Disable autostart for VM.

sudo virsh autostart --disable guest-vm-name

Kind of a nice feature that the VMs are automatically suspended and restored when you need to restart, meaning the VMs will resume to their previous state before you restarted.. as if nothing ever happened.

Categories
Tech

Install VMware Tools on Kali Linux

Open /etc/apt/sources.list with an editor

vi /etc/apt/sources.list

Append the following sources to the end of the file. Save the file.

deb http://http.kali.org/kali kali main non-free contrib
deb-src http://http.kali.org/kali kali main non-free contrib

Update the package lists to include the newly added sources.

apt-get update

Install the open-vm-tools package.

apt-get install open-vm-tools

All relevant dependencies will be satisfied and the relevant packages installed. Done.

Categories
Tech

Installing VMware Tools in VMware Fusion with CentOS Minimal (No GUI)

This guide assumes you already have successfully installed a CentOS virtual machine within VMware Fusion.

Launch your desired Virtual Machine and from the menu bar within VMware Fusion, select

Install VMware Tools

. This will load an iso and simulate a cd-rom has been inserted.

VMware Tools requires Perl as a dependancy, we need to resolve it before we can begin with the installation.

yum install perl

We need to mount the cd-rom within the guest virtual machine before we are able to access its content. We do this by
Creating a new folder to mount the cd-rom in.

mkdir /mnt/cdrom

Then we mount the cd-rom into the folder we just created. The fact that it is read-only is fine.

mount /dev/cdrom /mnt/cdrom

Now we need to access the disk and extract the tools somewhere.

cp /mnt/cdrom/VMwareTools-XXX.tar.gz /tmp

Change our working directory to tmp (shorter commands make life a little easier).

cd /tmp

The extracted files are compressed, we need to uncompress them.

gunzip VMWare-Tools-XXX.tar.gz
tar xvf VMWare-Tools-XXX.tar

Change working directory again into the newly decompressed folder.

cd vmware-tools-distrib

Finally, lets begin the VMware Tools installation.. just follow the onscreen instructions (I usually just leave everything as default).

./vmware-install.pl

See, easy peasy!