Categories
Tech

Clover r4586 update results in black screen

After updating my Z97X-UD3H running 10.12.6 to Clover r4586 the system would hang on a black screen shortly after the Clover boot menu.

Luckily I stumbled across this post that says the OsxAptioFix3Drv-64.efi driver has been removed, and that AptioMemoryFix.efi should be installed as its replacement from now on.

I can’t remember if Clover deleted OsxAptioFix3Drv-64.efi for me or not, but after installing AptioMemoryFix.efi the system started working again. Success!

A quick but useful explanation of the various drivers64UEFI memory fixes can be found here

Categories
Tech

macOS 10.12 Sierra GA-X58A-UD3R Hackintosh install (Clover)

macos-sierra-logo

With the recent release of macOS Sierra 10.12 (previously OS X) my current OS 10.10 Yosemite install has been pushed to n-2 support status (Apple supports 2 versions prior the current release), meaning Apple will drop support for security updates upon the next release of macOS, presumedly due 2017. This means the time has come to update my 10.10 Yosemite install to 10.12 Sierra.

I decided to just skip the 10.11 El Capitan release and perform a fresh install. Over the weekend I managed to get a fresh Sierra install working on a spare HDD, allowing me to test its stability whilst still running my daily workhorse Yosemite install.

Nearly everything works as it should; bluetooth, GPU HW acceleration, sound, ethernet. Once again the only thing not working properly is sleep/wake/hibernate. But I remain persistent to get those working with this release and install.

Below is a summarised step of instructions I performed to get a persistent working install, please note you will need access to an existing installation of OS X to perform the Hackintosh installation.

  1. Download the latest version of Sierra through the Mac App Store on the existing Mac.
  2. On a Windows installation, insert an 8GB (minimum) USB drive and quick format it to FAT32.
  3. Insert USB stick into the existing Mac and use Disk Utility to name the drive ‘USB’ as well as formatting the volume type: Mac OS Extended (Journaled).
  4. Using terminal, create a bootable USB installer by entering the following command
    sudo /Applications/Install\ macOS\ Sierra.app/Contents/Resources/createinstallmedia --volume /Volumes/USB --applicationpath /Applications/Install\ macOS\ Sierra.app --nointeraction
  5. Download the latest version of the Clover bootloader (r3793 at the time of writing)
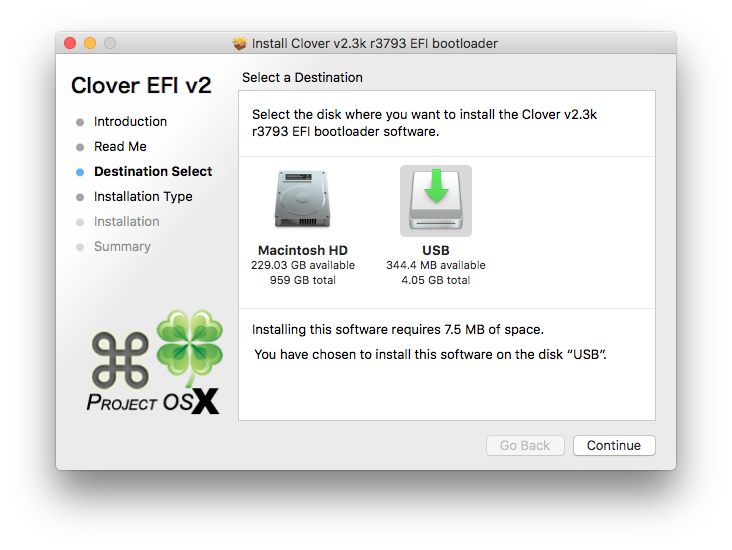
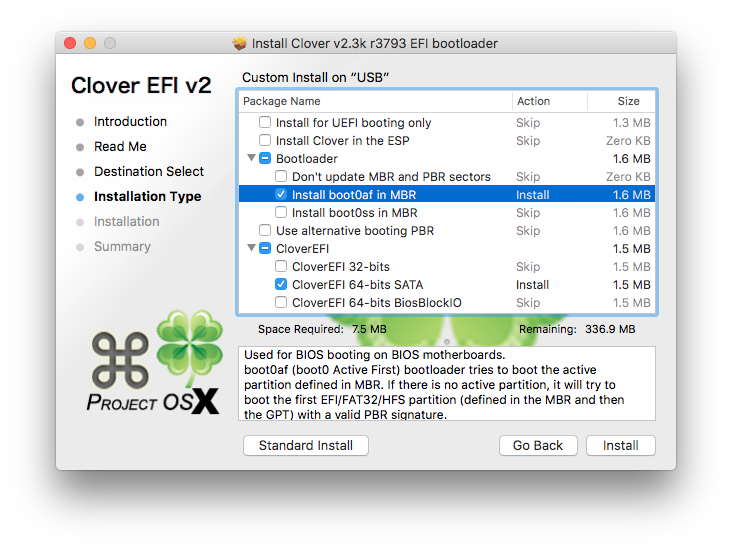
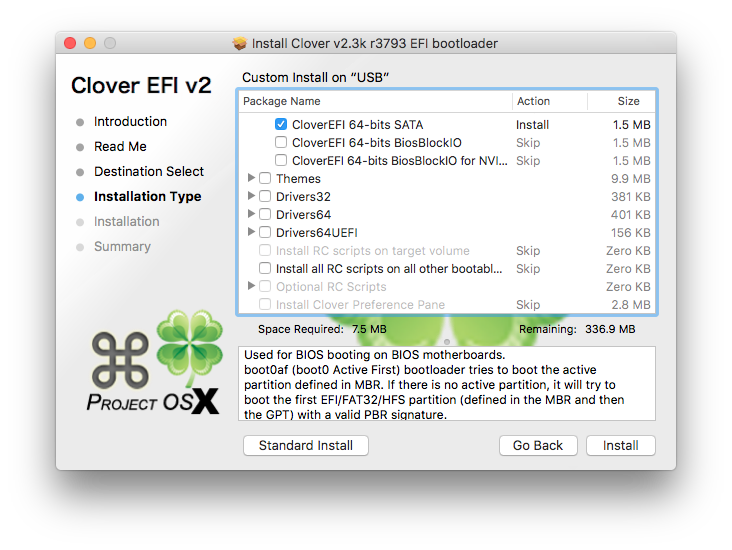
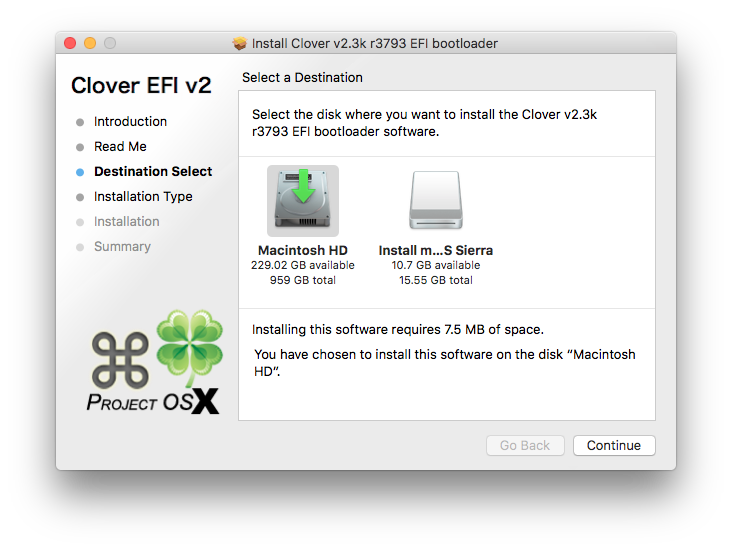
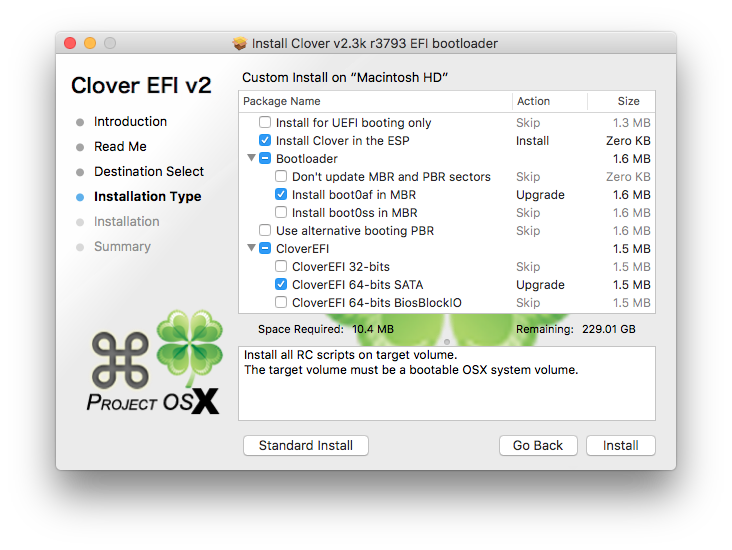
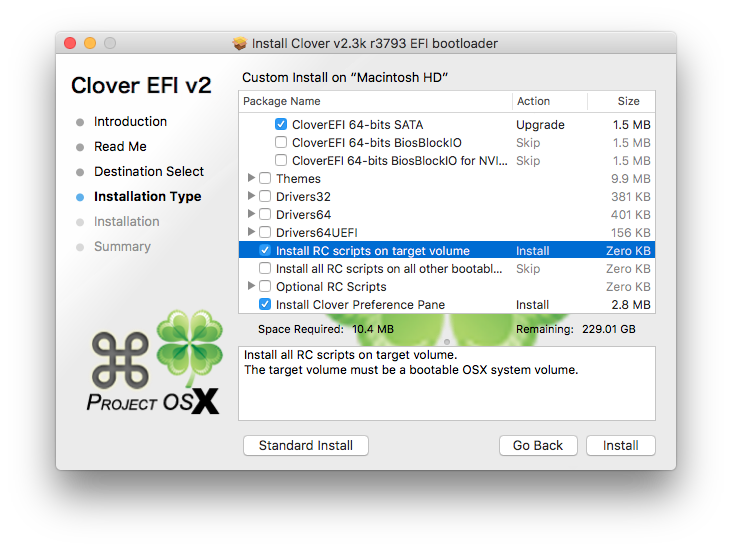
  6. Run the Clover installer and ensure that the USB is selected as the installation location, customise the config to mirror the settings below
    Select USB as the installation location
    Clover configuration options for GA-X58A-UD3R page 1
    Clover configuration options for GA-X58A-UD3R page 2
  7. Replace on the drive /EFI/CLOVER/config.plist with the config provided here
  8. Download and extract FakeSMC, NullCPUPowerManagement and RealtekRTL8111 to EFI/CLOVER/kexts/other
  9. Insert the USB in the X58A-UD3R Hackintosh, hit F12 on boot and boot from the USB installer
  10. When prompted by the Clover bootloader, boot from the macOS installer USB
  11. Install macOS Sierra as normal to your target drive. When the installer reboots the machine, ensure that you boot from the USB key again using F12, but then select to boot from the target drive in the Clover menu to finish off the installation
  12. When the install is finished, download Clover again and install it to the target drive using the following settings
    Ensure that the target drive is selected for the installation location
    clover-legacy-config-options-page1
    clover-legacy-config-options-page2
  13. Mount the EFI partition on the target drive using Clover Configurator
  14. Replace on the EFI partition /EFI/CLOVER/config.plist with the config from the USB
  15. On the EFI partition; create a folder at /EFI/CLOVER/kexts/10.12 and copy FakeSMC, NullCPUPowerManagement and RealtekRTL8111 from the USB into it.
  16. Download the relevant DSDT file for your X58A-UD3R (dependant on installed BIOS) from the DSDT database here and rename/copy to the EFI partition at /EFI/CLOVER/ACPI/patched/DSDT.aml
  17. Reboot the Hackintosh, remove the USB and you should be able to boot the target drive using the Clover bootloader (now installed on the target drive itself)
  18. I was able to get audio working by using clover configurator to disable SIP and then using Toleda’s scripts for Sierra to fix the audio

This install is still a work in progress for me and will be updated as time goes on and I hopefully get more things working.

Categories
Tech

Flush DNS OS X Yosemite 10.10.4 – discoveryutil command not found

With the recent update of OS X Yosemite to 10.10.4, the usual way of flushing the DNS using discoveryutil no longer works.

$ sudo discoveryutil mdnsflushcache; sudo discoveryutil udnsflushcaches
sudo: discoveryutil: command not found

discoveryutil has been replaced by mDNSResponder in 10.10.4.
The following command should clear the DNS cache.

sudo killall -HUP mDNSResponder
Categories
Tech

Gigabyte GA-X58A-UD3R 48GB RAM working install

Corsair Vengeance 16GB RAM kit

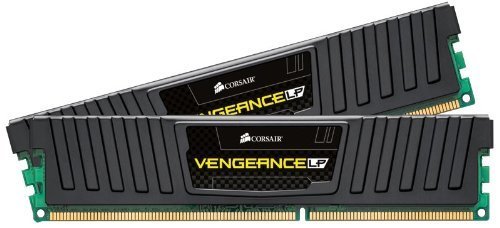
A few days ago I spotted an awesome RAM deal on HotUKDeals, Amazon UK were selling 16GB of Corsair Vengeance low profile (2 x 8GB) DDR3 1866 Mhz for only £83.57 inc VAT + delivery. My order was placed at the right time so it seems, as according to Amazon price checker camelcamelcamel £83.57 is the lowest price recorded.

I already had a set of this RAM lying around, so ordered two more kits for a total of 48GB (6 x 8GB modules). 24GB is the official maximum supported RAM for the X58 chipset, but after reading online about some success stories with 48GB I thought it was worth a shot. Popped the modules in my Gigabyte GA-X58A-UD3R Rev 2.0 and can confirm it runs as sweet as a nut. OS X Yosemite recognises the full 48GB and all 6 modules correctly, with no issues reported so far.

A nice quick win, a rarity so it seams for Hackintosh builds 😛

Categories
Tech

OS X 10.10 Yosemite GA-X58A-UD3R Clover install

Clover project logo

Clover > Chameleon

After many years of running the Chameleon boot loader, the time has come to climb Hackintosh ‘Everest’ and make the transition from Chameleon to using the Clover project boot loader. Like Chameleon Clover is a boot loader that allows Mac OS X to run on non-Apple hardware, however it is meant to bring numerous benefits and fixes over the former solution.

From reading forums online and after several previously failed attempts I don’t expect this to be an easy task, but this time I am determined to get it working.

Motivations

Clover is labeled as real EFI and Vanilla than Chameleon. Apple for one reason or enough has recently spruced up their security and services that used to run fine; like iMessage, no longer work. More commonly sleep has historical always been a sore spot for Hackintosh’s. Clover claims to alleviate most of these issues, only time and effort will tell.

Prerequisites

  • Disable USB 3.0 controller in BIOS
    • The installation kept freezing upon launch in Clover, after some reading I realised it was linked to the USB 3.0 controller. After disabling the USB 3.0 controller installation proceeded without issue. I will re-enable support at a later date and see if the controller still causes problems.

Installation

After a lot of reading online and testing different configurations I managed to get a working system booted, but my experience wasn’t as straight forward compared to other peoples from what I can tell.

I followed steps 1 to 3 from TonyMac’s guide clover guide. I then created a UniBeast USB in order to boot the freshly installed system, as for the life of me I could not get the system to boot using a USB installed with Clover. Once booted into the system I downloaded the latest version of Clover and began the installation process, which is similar to step 4 from TonyMac’s guide.

Clover USB installer checked configuration settings:

  • Install clover in the ESP
  • Bootloader > Install boot0af in MBR
  • CloverEFI > CloverEFI 64-bits SATA

Once installed I rebooted the system, removed the USB and was gladly presented with the OS X boot screen, Happy day!

Post Install

  • My Nvidia 680 GTX is natively supported, therefore I did not enable the Nvidia inject option.
  • Audio I got working using the usual method of Multibeast, I haven’t had any luck with getting it working using any of the alternative Clover methods yet.
  • Network also I got working using Multibeast
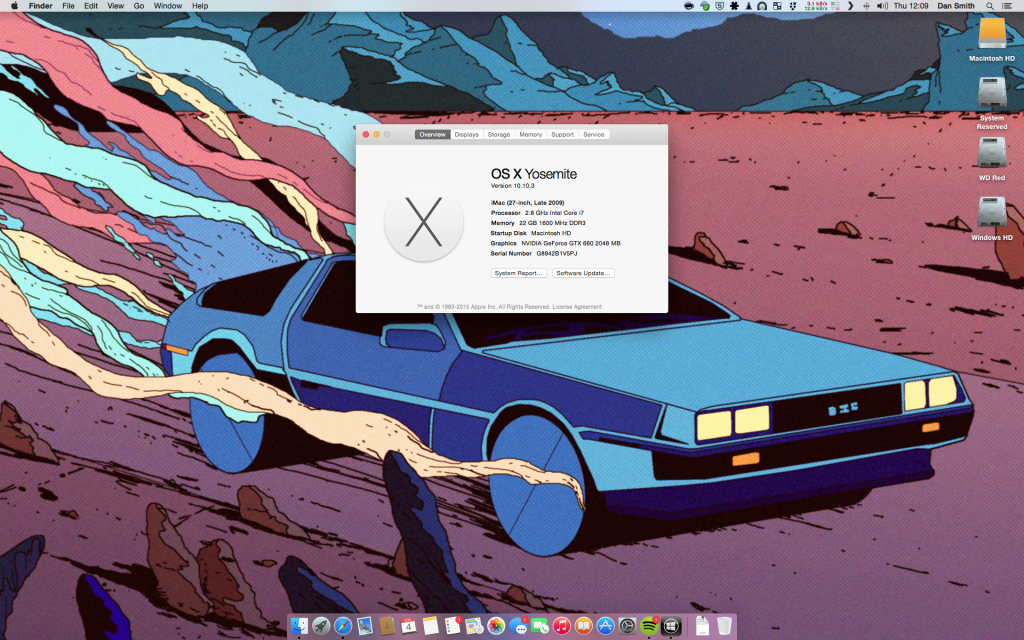
  • My 26GB RAM setup stopped working, but I have a feeling this might be linked to some of the SMBIOS settings as the Mac is now reporting as an iMac11,2 instead of my previous setup as a MacPro3,1

Either way I’m glad it is finally working.
About this Mac