![]()
FreeNAS is an amazing software stack and purpose built for hosting dedicated file storage shares, so it makes for an excellent platform to host a Time Machine compatible network share for use with OS X.
I wanted to build a server that would provide a reliable backup location with data redundancy for multiple Macs, with the ability to scale the storage space to meet future needs. Something which the current line of Apple TimeCapsules don’t offer, not to mention they are expensive for what they offer.
This setup will allow any Mac on the local network to backup to a central server using Ethernet/Wireless. I have gone the extra mile and included the ability of being able to remotely backup my MacBook Pro when away in London to my FreeNAS server at home using my OpenVPN server, but that’s for another post.
To clarify this was my first time using FreeNAS, I had no prior experience with the platform before writing this guide, so anyone should be able to recreate my setup with no prior knowledge of FreeNAS. My post is an updated version of an existing article I found, but is also a result of my own trial and errors. It takes time to figure out what works and what doesn’t.
Hardware
For storage I picked up 4 x WD Red 3TB for NAS (Inc WD Express Warranty) for £91.99 each (£183.98 total). I picked the 3TB over the 4TB partly because of cost, but namely for reliability as numerous forums discuss high failure rates for the 4TB models.
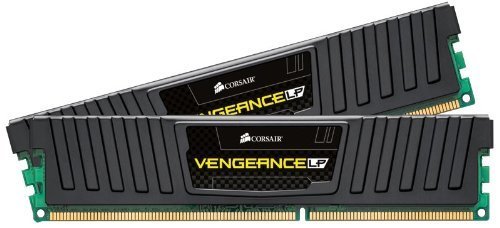
I decided to utilise one of my G7 HP MicroServers as a dedicated FreeNAS server. The 2 WD Red drives were installed for storage, as well as a 32GB SanDisk Cruzer for the FreeNAS OS. I also maxed out the 16GB Kingston ECC RAM to help cope with the ZFS filesystems (the minimum recommended is 8GB).
Prerequisites
You need to have a working install of FreeNAS before you can attempt this guide. I won’t detail over the OS installation as it’s fairly simple and has been documented numerous times over online, without forgetting to mention the amazing documentation that comes with FreeNAS Doc.
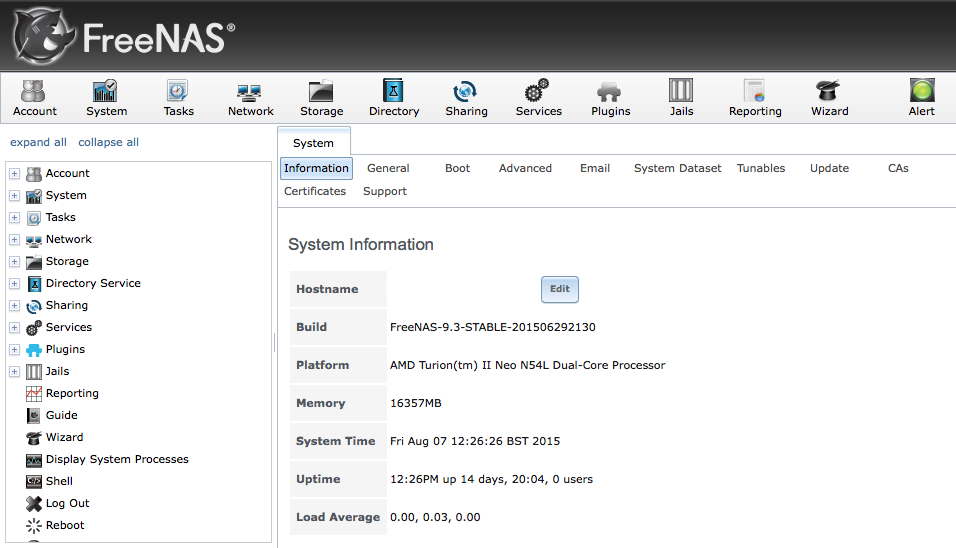
FreeNAS 9.3 is the current release at time of writing and is what this guide is based on, although future versions should also work fine.
Create ‘time-machine’ Group
The first step is to create a system group for the Time-Machine share in preparation for adding users.
Under the ‘Account’ menu item, expand the ‘Groups’ item, then select ‘Add Group’. Note that in my screenshots I already have a group called ‘Time-Machine’, your system won’t have until you complete this step.
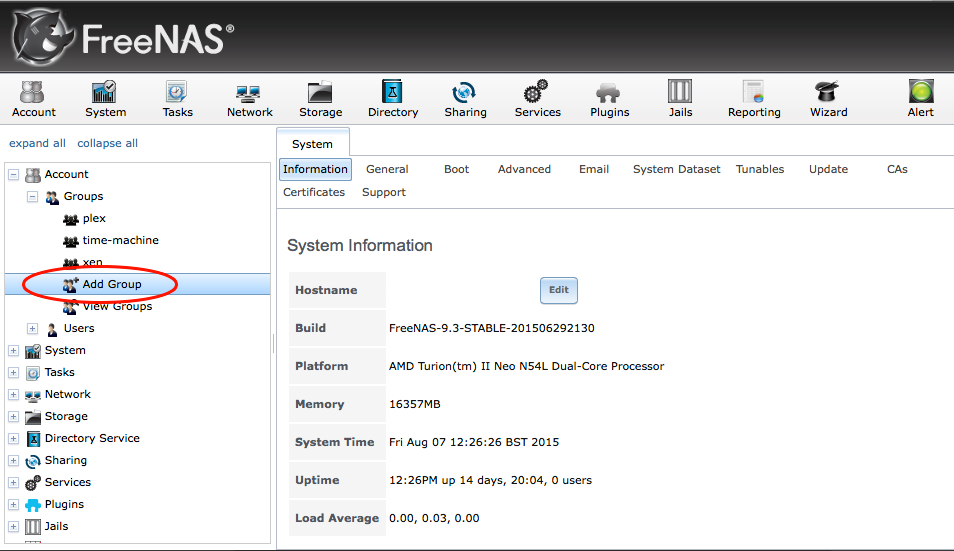
An ‘Add Group’ dialog box should pop up, prompting you to create the new group.
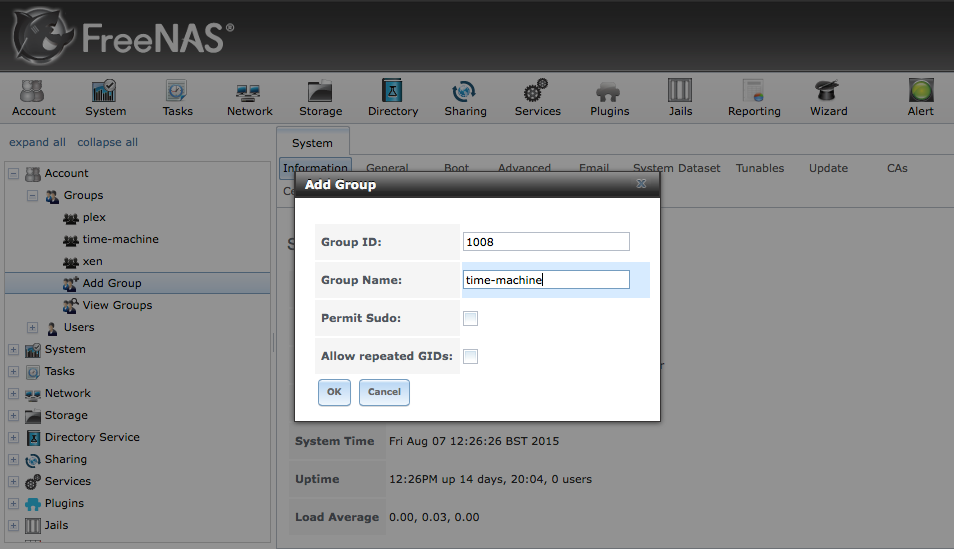
Set the config as follows:
- Leave ‘Group ID’ to whatever it is by default
- Set ‘Group Name’ to ‘time-machine’
Leave everything else as default and click OK. Our newly created ‘time-machine’ group should be visible under the ‘Groups’ section now.
Create and Configure Time-Machine ZFS Dataset
Now it’s time to create the ZFS dataset which will be used to store the Time Machine backups. You must have a ZFS volume already created for this step, if you haven’t got one then you should go read through the ZFS primer in the FreeNAS docs.
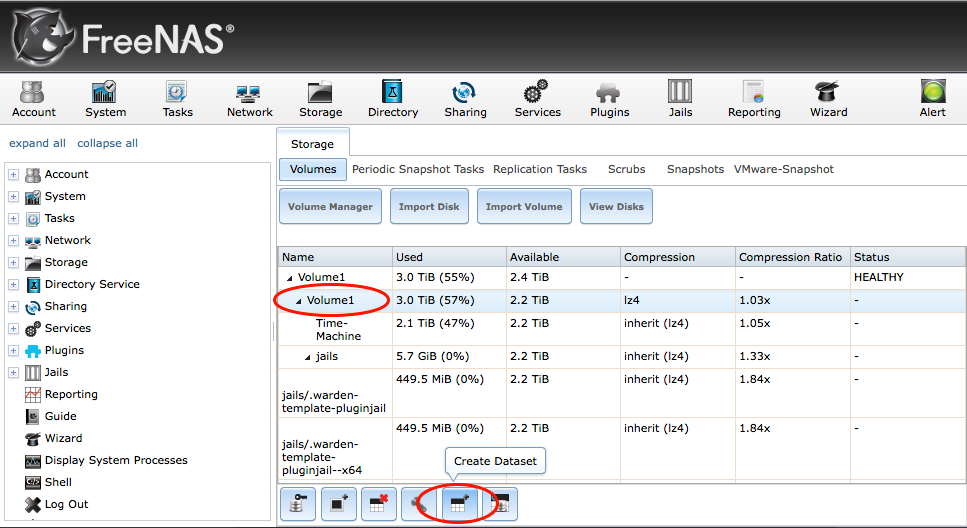
Under the ‘Storage’ tab select the ‘Volumes’ menu item, then select your ZFS volume (Volume1 in my case) and then select ‘Create Dataset’.
A ‘Create ZFS Dataset’ dialog box should pop up, prompting you to create the new ZFS dataset.
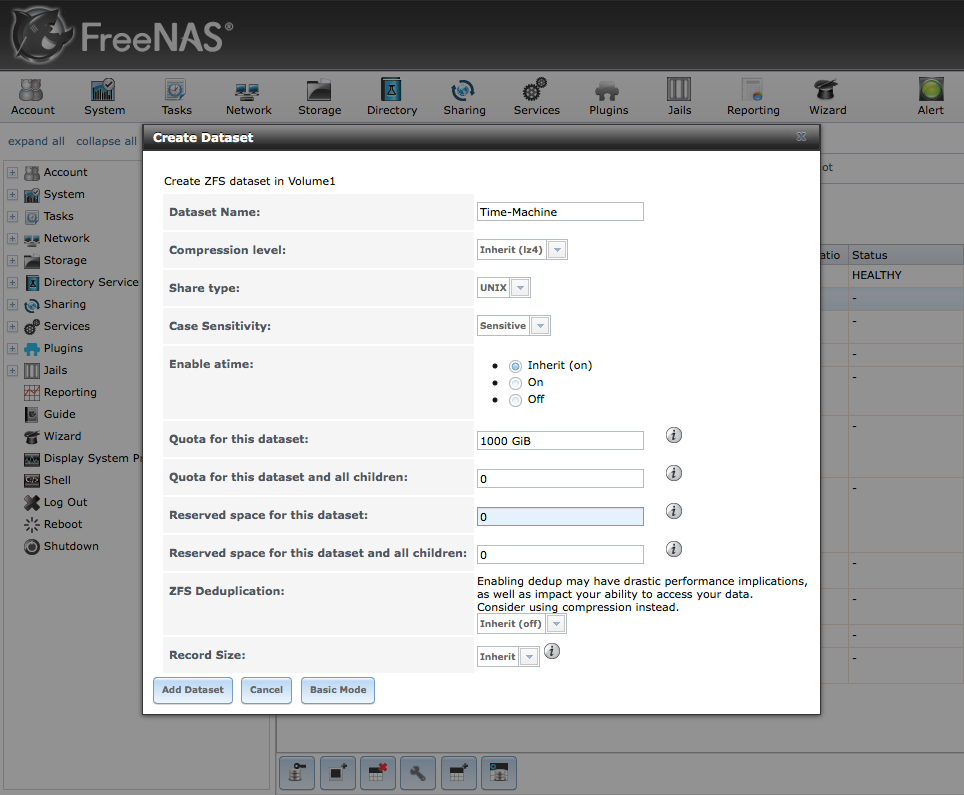
Ensure the wizard is in ‘Advanced Mode’ and then set the config as follows:
- Set ‘Dataset Name’ to ‘Time-Machine’
- Set ‘Quota for this dataset’ to ‘1000 GiB’
In the section option we are specifying a quota for the dataset, effectively settings the size of available disk space for our Time Machine backups. Change the value if 1000 GiB is not suitable for your setup.
Leave everything else as default and click ‘Add Dataset’. Our newly created ‘Time-Machine’ dataset should be visible under the ‘Volumes’ section now.
Now we need to configure the permissions for our ‘Time-Machine’ dataset, so that our ‘time-machine’ group has read/write access.
Select the dataset (Time-Machine) and then select ‘Change Permissions’.
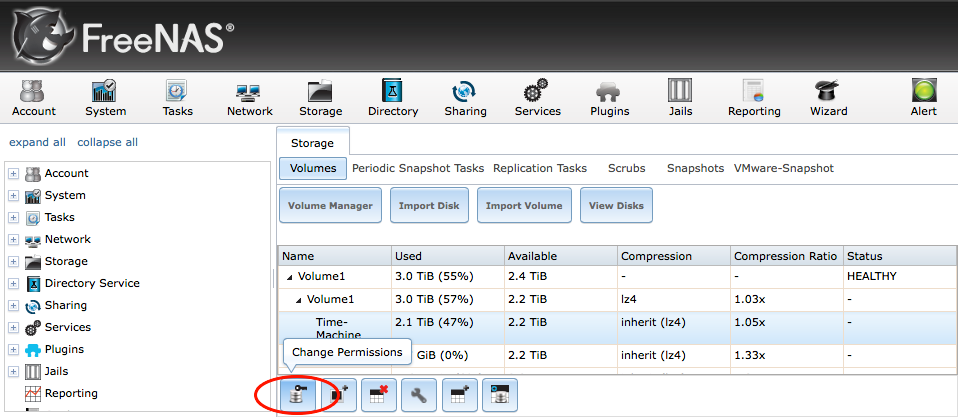
A ‘Change Permissions’ dialog box should pop up, prompting you to edit the ZFS dataset.
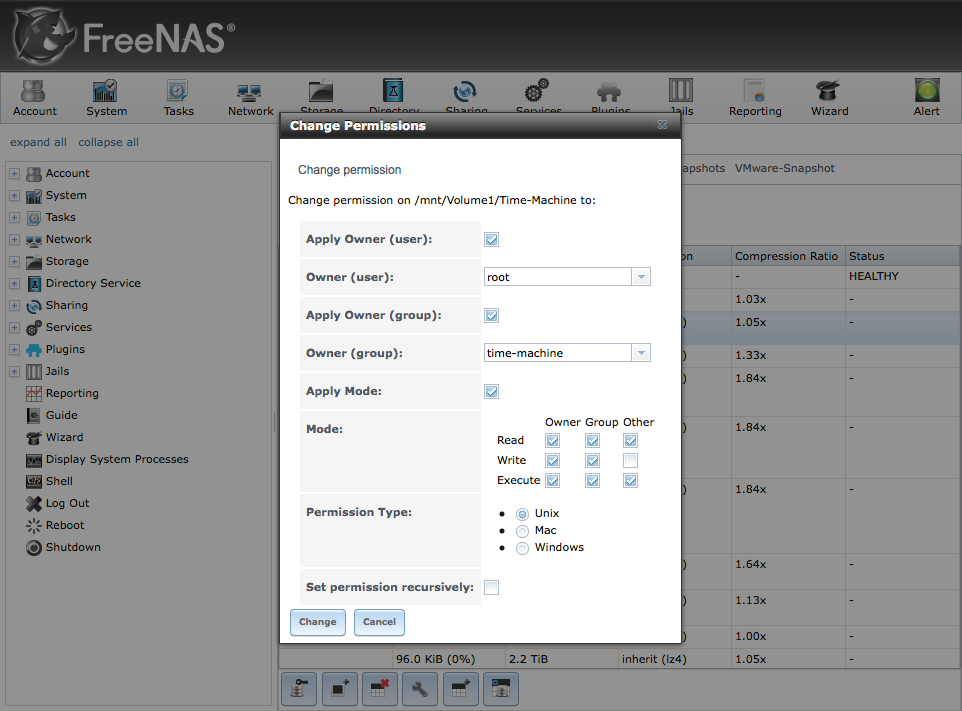
Set the config as follows:
- Set ‘Owner (group)’ to ‘time-machine’
- Set ‘Mode’ checkboxes to the same as mine in the screenshot
Click ‘By setting the group owner to the ‘time-machine’ group, we are granting any users of that group read/write/execute permissions.
Create Time-Machine Users
Now it’s time to create a separate user to represent each computer that will use the FreeNAS server for Time Machine backups.
Under the ‘Account’ menu item, expand the ‘Users’ item, then select ‘Add User’.
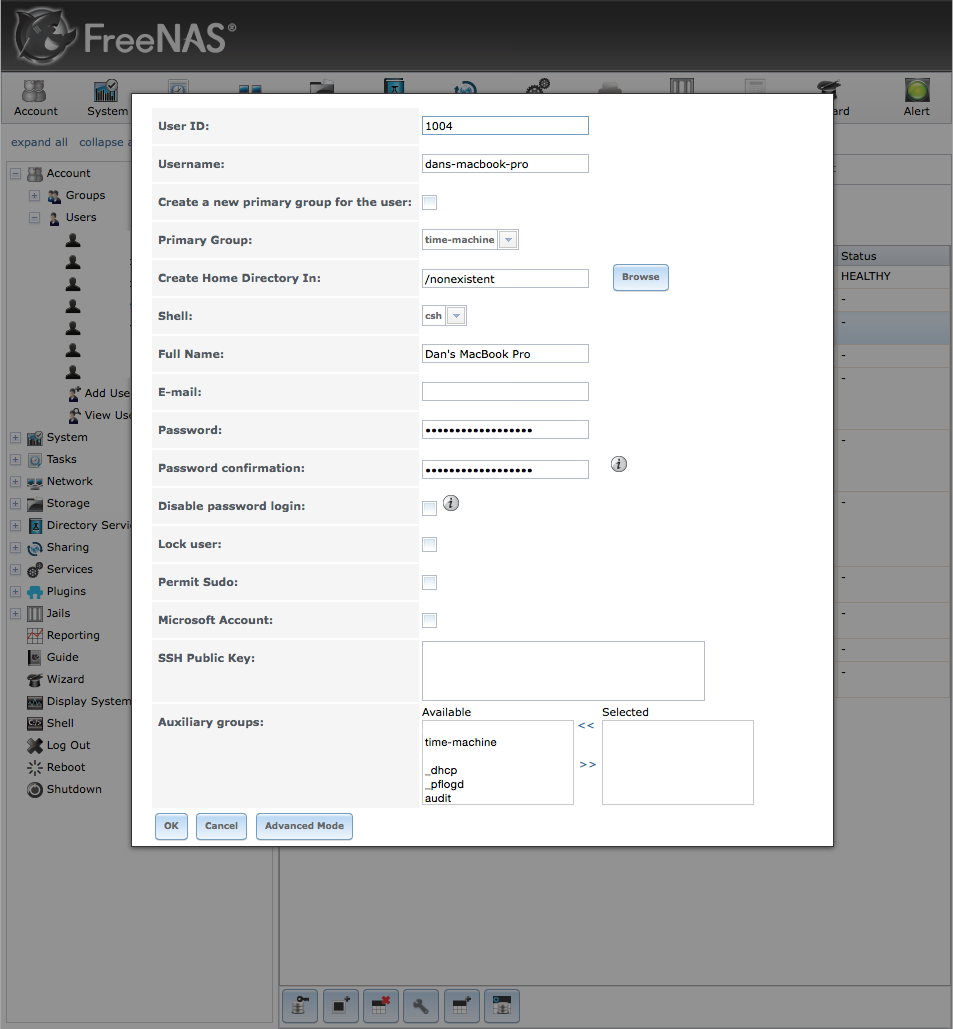
Set the config as follows, but change the relevant information related to your setup:
- Leave ‘User ID’ to whatever it is by default
- Set ‘Username’ to ‘dans-macbook-pro’
- Ensure ‘Create a new primary group’ is deselected
- Set ‘Primary Group’ to ‘time-machine’
- Set ‘Full Name’ to ‘Dan’s MacBook Pro’
- Set ‘Password’ to something strong (mix of; uppercase, lowercase, numbers, 16 chars long)
Leave everything else as default and click OK. Our newly created ‘dans-macbook-pro’ should be visible under the ‘Users’ section now.
Create Time-Machine AFP Share
The last step on the FreeNAS server is to create the AFP Share that will broadcast the storage on the local network.
Under the ‘Sharing’ tab select the ‘Apple (AFP)’ menu item, and then select ‘Add Apple (AFP) Share’.
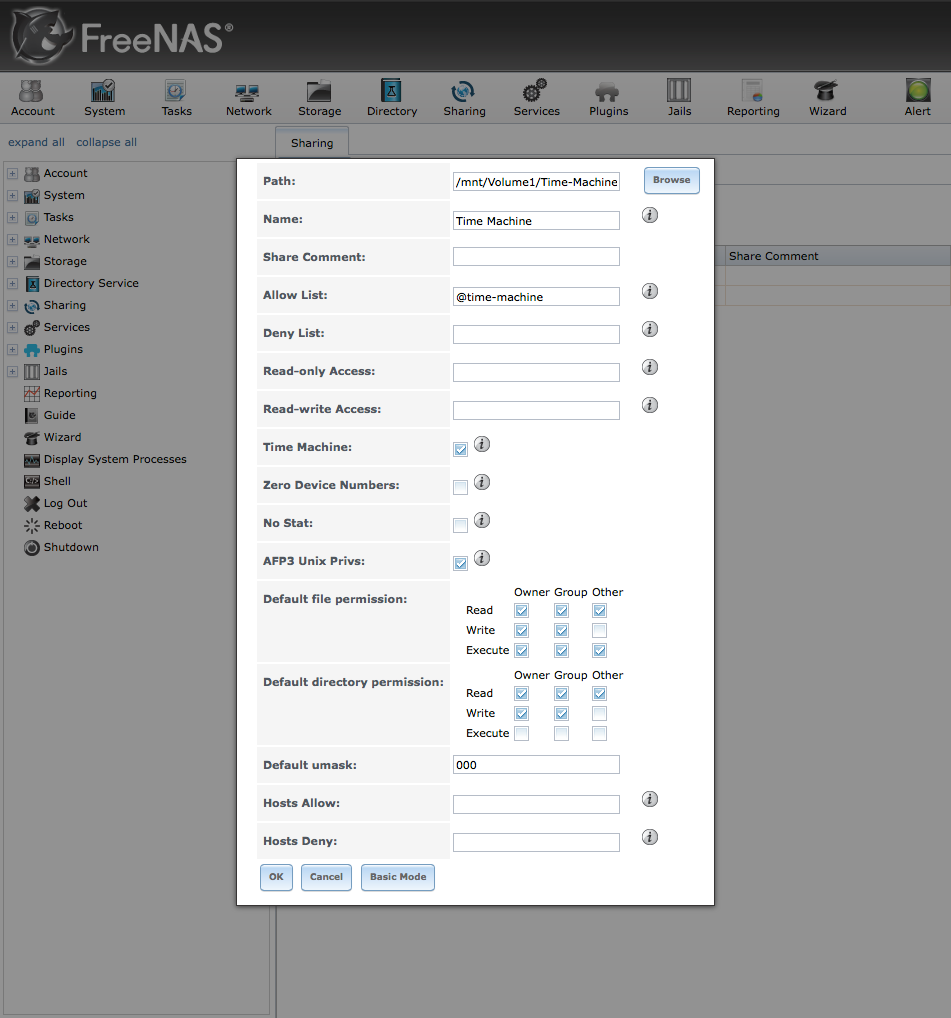
Ensure the wizard is in ‘Advanced Mode’ and then set the config as follows:
- Set ‘Name’ to ‘Time Machine’
- Set ‘Path’ to your ZFS dataset path
- Set ‘Allow List’ to ‘@time-machine’
- Ensure the ‘Time Machine’ box is checked
- Ensure the ‘Default file permission’ is set to the same as the screenshot
- Ensure the ‘Default directory permission’ is set to the same as the screenshot
Add Time Machine Backup to OS X
Finally the last step is to configure Time Machine itself to backup to the newly created share.
In OS X, select ‘Time Machine’ from within ‘System Preferences’, and then click the ‘Select Disk’ button.
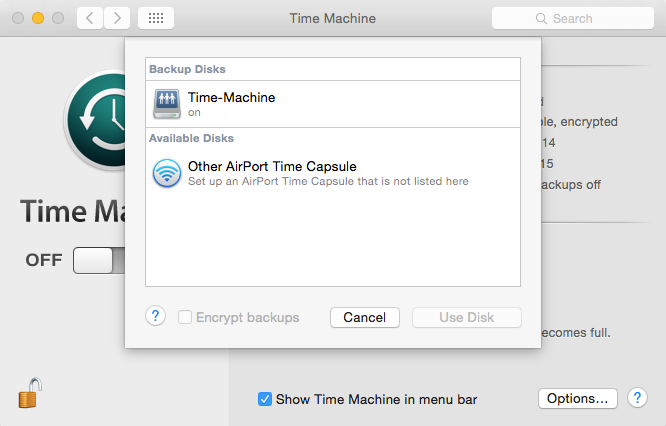
All being well your FreeNAS AFP share should be listed. If you select to use the disk for Time Machine you will be prompted to enter the username and password for the FreeNAS user we created previously. That’s the last step, Time Machine should begin backing up shortly after adding the disk. I recommend that the first backup be completed over Ethernet instead of wireless as the initial backup can take considerable time.
I have used this setup for a couple of years now backing up 4/5 Mac’s with no real issues. Any problems I have ran into have most revolved around sudden shutdowns of the FreeNAS server midway through Time Machine backing up due to power cuts/loss. My Storage is setup using ZFS in striped mirrored mode, meaning I get the best of both for speed and disk redundancy.
Please let me know if you found this guide useful, or spot any mistakes above.